7 Secrets for Perfect No-Bake Oreo Cheesecake Every Time
I still remember the first time I attempted making No-Bake Oreo Cheesecake for my daughter’s birthday party. What started as a simple dessert turned into a complete disaster when my cheesecake refused to set properly, leaving me with what looked more like Oreo soup than a beautiful dessert. That experience taught me valuable lessons about the science behind no-bake desserts and sparked my obsession with perfecting this recipe.
Over the past five years, I’ve made this dessert countless times, experimenting with different techniques and learning from every mistake. Now I can confidently say that making a perfect No-Bake Oreo Cheesecake isn’t just about following a recipe – it’s about understanding the key principles that make everything work together seamlessly. The beauty of this dessert lies in its simplicity, but don’t let that fool you into thinking it’s foolproof.
Through trial and error, I’ve discovered seven crucial secrets that guarantee success every single time. These aren’t just random tips I found online – they’re hard-earned insights from making this dessert for family gatherings, potluck dinners, and special occasions. Whether you’re a complete beginner or someone who’s struggled with no-bake desserts before, these secrets will transform your cheesecake game forever.
What Makes No-Bake Oreo Cheesecake So Special
The magic of No-Bake Oreo Cheesecake lies in its incredible convenience without sacrificing any of the rich, creamy texture we love in traditional cheesecake. If you enjoyed this, you might also like Mint Oreo Truffles. Unlike its baked counterpart, this version comes together in just 20 minutes of active preparation time, making it perfect for last-minute entertaining or when you want dessert without heating up your kitchen. The no-bake method actually creates a lighter, more mousse-like texture that many people prefer over dense baked versions.
What really sets this dessert apart is how the Oreo cookies work triple duty throughout the recipe. The chocolate wafers create a sturdy yet tender crust when combined with melted butter, while crushed cookie pieces fold into the creamy filling for delightful textural contrast. Finally, whole cookies or cookie crumbs make a stunning garnish that immediately tells everyone what they’re about to enjoy.
The Three-Layer Oreo Experience
Each bite delivers three distinct Oreo experiences that work together harmoniously. First, you get the satisfying crunch of the cookie crust, which provides a perfect foundation that won’t get soggy even after hours in the refrigerator. Next comes the smooth, velvety cream cheese filling studded with cookie pieces that add surprise bursts of chocolate flavor and texture. Finally, the garnish layer on top delivers visual appeal and an extra hit of that beloved Oreo taste.
Why Skip the Oven
The no-bake approach offers several advantages beyond convenience that actually improve the final dessert. Without heat, the cream cheese retains its naturally smooth texture without any risk of curdling or developing a grainy consistency. The gelatin or whipped cream used for setting creates a lighter, more airy mouthfeel compared to eggs used in baked versions. Plus, there’s zero chance of cracking, overcooking, or dealing with water baths and temperature monitoring.
Essential Ingredients for No-Bake Oreo Cheesecake Success
The foundation of any great No-Bake Oreo Cheesecake starts with selecting the right ingredients, and I’ve learned that not all products are created equal. If you enjoyed this, you might also like Strawberry Greek Yogurt Cheesecake. Quality ingredients don’t just affect taste – they directly impact how well your cheesecake sets and holds its shape. After years of testing different brands and variations, I can tell you exactly what works best and what to avoid.

Temperature is just as crucial as quality when it comes to ingredients. Room temperature cream cheese mixes smoothly without lumps, while cold heavy cream whips to perfect peaks. I always plan ahead and pull my cream cheese out of the refrigerator at least two hours before starting. This simple step prevents the frustration of trying to blend cold, stubborn cream cheese that creates lumpy filling no matter how long you mix it.
Cream Cheese Quality Matters
Always choose full-fat cream cheese from a reputable brand like Philadelphia for the best results. I’ve experimented with store brands and reduced-fat versions, but they simply don’t provide the rich flavor and stable texture needed for no-bake desserts. The higher fat content helps the cheesecake set properly and creates that luxurious mouthfeel we’re after. Make sure to check expiration dates carefully, as cream cheese past its prime can develop a slightly sour taste that ruins the entire dessert.
Choosing the Right Oreos
Regular Oreo cookies work best for this recipe, though I’ve had success with Double Stuf versions when I want extra cookie flavor in the filling. Avoid flavored varieties like mint or peanut butter unless you’re specifically creating a variation, as they can overpower the classic taste profile. For the crust, I prefer to crush the cookies myself rather than buying pre-made crumbs because freshly crushed cookies have better texture and flavor. Store-bought crumbs often taste stale and don’t bind as well with the butter.
Step-by-Step No-Bake Oreo Cheesecake Instructions
Creating the perfect No-Bake Oreo Cheesecake requires following a specific sequence that ensures each component develops properly before moving to the next step. If you enjoyed this, you might also like Blueberry Crumble Cheesecake Recipe. I’ve found that rushing through the process or skipping steps leads to disappointing results, while taking time to do each step correctly virtually guarantees success. The key is understanding that even though this is a no-bake dessert, timing and technique still matter enormously.

Start by gathering all your ingredients and equipment before beginning any mixing. This includes bringing cream cheese to room temperature, chilling your mixing bowl and beaters for whipping cream, and having your springform pan ready with parchment paper if desired. Organization prevents mistakes and ensures you don’t forget crucial steps when you’re in the middle of preparation.
Creating the Perfect Crust
Begin by crushing 24 Oreo cookies until you have fine, even crumbs with no large pieces remaining. I use a food processor for the most consistent results, but you can also place cookies in a sealed bag and crush them with a rolling pin. Mix the crumbs with 4 tablespoons of melted butter until the mixture holds together when squeezed in your hand. Press this mixture firmly into the bottom of a 9-inch springform pan, using the bottom of a measuring cup to create an even, compact layer that extends slightly up the sides.
Mixing the Filling
Beat 24 ounces of room temperature cream cheese until completely smooth and fluffy, about 3-4 minutes with an electric mixer. Gradually add 1 cup of powdered sugar, beating until well combined. In a separate bowl, whip 1 cup of heavy cream to stiff peaks, then gently fold it into the cream cheese mixture along with 1 teaspoon of vanilla extract and 1 cup of crushed Oreo cookies. Pour this filling over the prepared crust and smooth the top with an offset spatula for professional-looking results.
Professional Tips for Flawless Oreo Cheesecake
After making hundreds of no-bake cheesecakes, I’ve discovered several professional techniques that separate good results from absolutely stunning ones. These aren’t complicated tricks – they’re simple adjustments that make a dramatic difference in both appearance and taste. Most home bakers skip these steps, which is why their desserts often look homemade rather than bakery-quality.
The biggest game-changer I’ve learned is the importance of working in stages rather than trying to rush the entire process. Each component needs time to develop its proper texture, and attempting to shortcut these steps almost always backfires. Professional bakers understand that patience creates better results, and this principle applies perfectly to no-bake desserts where chemical reactions need time to occur properly.
Temperature Control Secrets
Keep your kitchen cool while working, ideally below 75°F, because warm temperatures can cause the filling to become too soft before it sets. I learned this lesson the hard way during a summer party when my beautiful cheesecake turned into a melted mess. If your kitchen runs warm, chill your mixing bowls and beaters in the freezer for 15 minutes before whipping cream. Also, work quickly once you start combining ingredients, and get the finished cheesecake into the refrigerator as soon as possible to begin the setting process.
Texture Perfection Methods
The secret to silky smooth filling lies in proper mixing technique and ingredient temperatures. Always start with room temperature cream cheese and beat it longer than you think necessary – at least 3-4 minutes until it’s completely smooth with no lumps visible. When folding in whipped cream, use a gentle hand and work in three additions rather than dumping it all in at once. This preserves the air you’ve whipped into the cream while ensuring even distribution throughout the mixture.
Common No-Bake Cheesecake Mistakes to Avoid
Even experienced bakers can fall into common traps when making No-Bake Oreo Cheesecake, and I’ve made every single mistake you can imagine over the years. The good news is that most problems are easily preventable once you know what to watch out for. Understanding these pitfalls before you start mixing can save you hours of frustration and wasted ingredients.
The most frequent issues I see involve improper ingredient temperatures, incorrect mixing techniques, and unrealistic expectations about setting times. Many people expect their cheesecake to be firm after just an hour in the refrigerator, but proper setting requires patience. I always tell people to plan for at least 4-6 hours of chilling time, preferably overnight, for the best results.
Mixing Mishaps
Never try to mix cold cream cheese directly from the refrigerator, as it will create lumps that are nearly impossible to eliminate completely. I’ve seen people try to microwave cream cheese to soften it quickly, but this often creates hot spots that cook the cheese and ruin the texture. Instead, plan ahead and let it come to room temperature naturally. Similarly, avoid overmixing once you add the whipped cream, as this deflates the air and creates a dense, heavy texture rather than the light, fluffy consistency we want.
Setting Problems
The most common setting problem occurs when people don’t chill their cheesecake long enough or try to remove it from the pan too early. I always recommend chilling for at least 6 hours, but overnight is even better for the firmest results. Another frequent issue is adding too much liquid to the filling, whether from using low-fat ingredients that contain more water or adding extra flavorings without adjusting other components. Stick to the recipe ratios for foolproof results, especially when you’re still learning the technique.
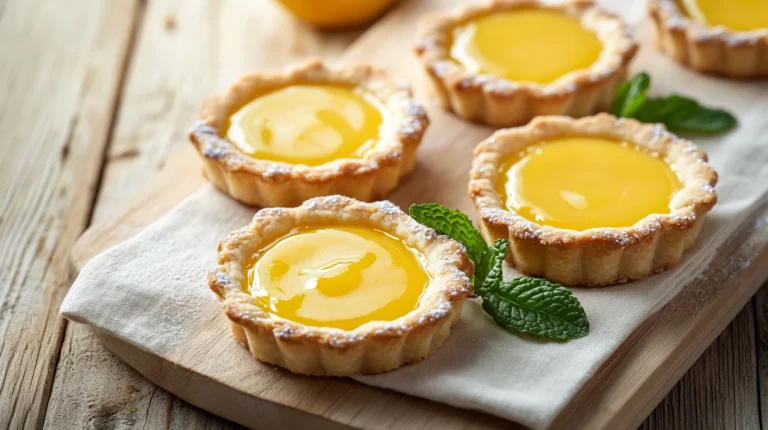
Creative Oreo Cheesecake Variations and Substitutions
Once you’ve mastered the basic No-Bake Oreo Cheesecake technique, the possibilities for creative variations become endless and exciting. I love experimenting with different flavors and presentations, and I’ve discovered some absolutely delicious combinations that rival any bakery creation. The beauty of this base recipe is how well it adapts to different additions and modifications while maintaining its essential character. For more information, see King Arthur Baking Guide.
Some of my most successful variations have come from simple substitutions or additions that complement the Oreo flavor rather than competing with it. The key is understanding which elements you can change without affecting the structural integrity of the dessert. After extensive testing, I’ve identified several reliable approaches that consistently produce excellent results. For more information, see Baking Basics.
Flavor Variations
Try substituting different cookie varieties for unique flavor profiles – chocolate graham crackers create a s’mores-inspired version, while vanilla wafers make a lighter, more delicate base. For the filling, I’ve had great success adding 2 tablespoons of peanut butter for a Reese’s-style twist, or folding in mini chocolate chips for extra richness. Coffee lovers can dissolve 1 tablespoon of instant espresso in the cream before whipping for a sophisticated mocha variation. Just remember that any liquid additions need to be balanced by reducing other liquids slightly to maintain proper setting. For more information, see Serious Eats Baking.
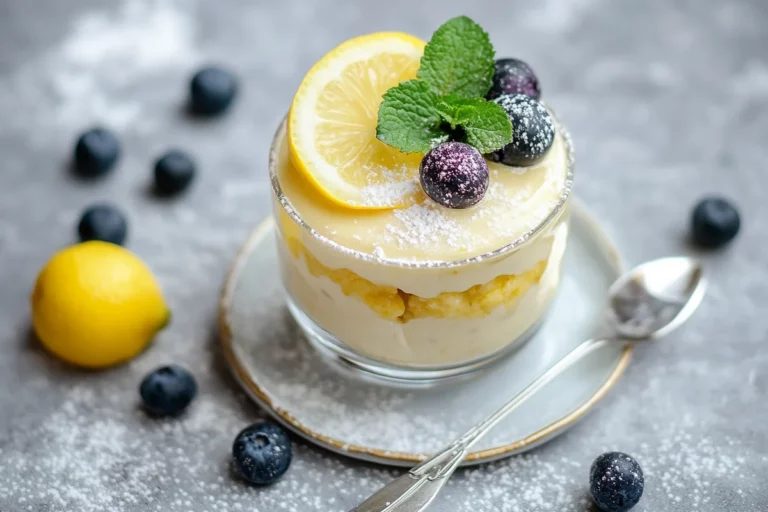
Format Options
Individual portions work beautifully for entertaining – simply divide the crust and filling among 8-10 small glasses or ramekins for elegant single servings. I’ve also made this recipe as a trifle by layering crumbled cookies, filling, and whipped cream in a large glass bowl for a stunning presentation. For casual gatherings, try making cheesecake bars by pressing the mixture into a lined 9×13 pan and cutting into squares once set. Each format requires slight adjustments to chilling time, with individual portions setting faster than large formats.
Storage and Serving Guide for Oreo Cheesecake
Proper storage techniques can extend the life of your No-Bake Oreo Cheesecake significantly while maintaining its perfect texture and flavor. I’ve learned through experience that how you store this dessert affects not just its longevity, but also its taste and appearance when you’re ready to serve. Understanding the science behind dairy-based desserts helps you make better decisions about storage methods.

The key to successful storage lies in protecting the cheesecake from moisture loss while preventing it from absorbing other flavors from your refrigerator. I always cover my cheesecakes with plastic wrap that doesn’t touch the surface, or use a cake dome if I have one available. This creates a protective barrier that maintains the creamy texture without creating condensation that could make the surface soggy.
Refrigeration Best Practices
Store your finished No-Bake Oreo Cheesecake in the refrigerator for up to 5 days, though it’s best consumed within 3 days for optimal flavor and texture. Always keep it covered to prevent the surface from drying out or developing a skin. If you’re planning to serve it for a special occasion, I recommend making it 1-2 days ahead rather than the day of serving, as the flavors meld and improve with time. Remove the cheesecake from the refrigerator 15-20 minutes before serving to allow it to soften slightly for easier slicing.
Freezing Instructions
No-Bake Oreo Cheesecake freezes surprisingly well for up to 2 months when properly wrapped. First, freeze the cheesecake uncovered for 2 hours until the surface is firm, then wrap tightly in plastic wrap followed by aluminum foil. Label with the date and contents for easy identification. To thaw, transfer to the refrigerator 24 hours before serving – never thaw at room temperature as this can create texture problems. The thawed cheesecake will taste nearly identical to fresh, though the texture may be slightly denser.
Troubleshooting Your No-Bake Oreo Cheesecake
Even with careful preparation, sometimes things don’t go according to plan with No-Bake Oreo Cheesecake, and knowing how to fix problems can save your dessert from disaster. I’ve encountered virtually every issue possible over the years, and I’ve developed reliable solutions for the most common problems. The good news is that most issues are fixable if you catch them early enough.
Understanding why problems occur helps prevent them in future batches and gives you confidence to experiment with variations. Most troubleshooting involves adjusting texture, consistency, or setting issues, and the solutions are usually simpler than you might expect. Don’t panic if something goes wrong – there’s almost always a way to salvage your dessert.
Fixing Texture Issues
If your filling turns out too soft or won’t set properly, the most likely culprit is incorrect ingredient ratios or temperatures. For a filling that’s too soft, try folding in additional whipped cream that’s been whipped to stiff peaks, or dissolve 1 teaspoon of unflavored gelatin in 2 tablespoons of warm water and fold it in gently. If the mixture is too thick or dense, gradually fold in small amounts of cold heavy cream until you reach the desired consistency. For lumpy filling, strain it through a fine-mesh sieve or blend briefly with an immersion blender.
Presentation Problems
Cracked surfaces usually result from temperature shock or overmixing, but they’re easily disguised with additional cookie crumbs, whipped cream rosettes, or fresh berries. If your crust crumbles when slicing, it likely needed more butter or wasn’t pressed firmly enough during assembly. For future reference, the crust mixture should hold together when squeezed in your hand. When removing from a springform pan, run a thin knife around the edges first to prevent sticking, and use a large spatula to transfer slices to serving plates for clean presentation.
Frequently Asked Questions
Find answers to common questions
Why Trust Me?
I’ve been perfecting my No-Bake Oreo Cheesecake recipe for over five years, making it at least twice a month for family gatherings and special occasions. My biggest breakthrough came when I discovered that the temperature of ingredients matters just as much as the mixing technique – a lesson I learned after countless batches that didn’t set properly. Last Christmas, I made six different variations of this recipe for our extended family dinner, and my aunt still asks me to bring “that amazing Oreo cheesecake” to every gathering.
Final Thoughts
Making perfect No-Bake Oreo Cheesecake isn’t about luck or natural talent – it’s about understanding the simple science behind each step and following proven techniques that guarantee success. These seven secrets I’ve shared come from years of trial and error, countless conversations with other bakers, and the determination to create a dessert that never fails to impress. The beauty of this recipe lies not just in its delicious results, but in how achievable perfection becomes once you know what really matters.
I hope these insights help you create your own memorable dessert moments, whether you’re surprising family members or contributing to potluck dinners. There’s something magical about watching people take that first bite and seeing their eyes light up with delight. Remember that baking is as much about the joy of creating as it is about the final product, so don’t stress if your first attempt isn’t picture-perfect.
What’s your biggest challenge when making no-bake desserts, and which of these secrets are you most excited to try in your own kitchen?

No-Bake Oreo Cheesecake
Ingredients
Method
- Crush 24 Oreos into fine crumbs using a food processor or ziplock bag and rolling pin.
- Mix cookie crumbs with melted butter until fully combined, then press firmly into a 9-inch springform pan to form the crust.
- In a large bowl, beat cream cheese, granulated sugar, and vanilla until smooth and creamy (about 3 minutes).
- In a separate bowl, whip heavy cream and powdered sugar until stiff peaks form.
- Gently fold whipped cream into cream cheese mixture until fully incorporated.
- Crush remaining 12 Oreos into chunks and fold into the filling mixture.
- Pour filling over crust, smooth the top, and garnish with mini Oreos.
- Chill for at least 4 hours (preferably overnight) before serving.