7 Expert Tips and Common Mistakes to Avoid
Do you remember that childhood thrill of biting into a perfectly chewy gummy bear? I’ve been obsessed with recreating that magical texture, but with ingredients that actually nourish my body. That’s how I discovered the incredible world of Healthy Gelatin Gummy Bears – and trust me, they’re just as addictive as the store-bought version.
My journey started when my daughter kept begging for gummy snacks at the grocery store. After reading those ingredient labels packed with artificial colors and high fructose corn syrup, I knew I had to find a better way. So I rolled up my sleeves and started experimenting in my kitchen, determined to create something that would satisfy her sweet tooth without the guilt.
What I discovered completely blew my mind. Not only could I make gummies that tasted incredible, but I could also pack them with beneficial nutrients like collagen, real fruit, and natural sweeteners. My family actually started requesting these homemade treats over the conventional ones!
In this article, you’ll learn seven surprising methods to transform simple gelatin into delicious, nutritious gummy bears. I’ll share my favorite flavor combinations, the best natural sweeteners to use, and those little tricks I’ve picked up that make all the difference. You’ll also discover how to customize these treats for different dietary needs, from sugar-free options to immune-boosting varieties. Get ready to become your family’s new favorite candy maker!
Essential Ingredients for Healthy Gummy Bears
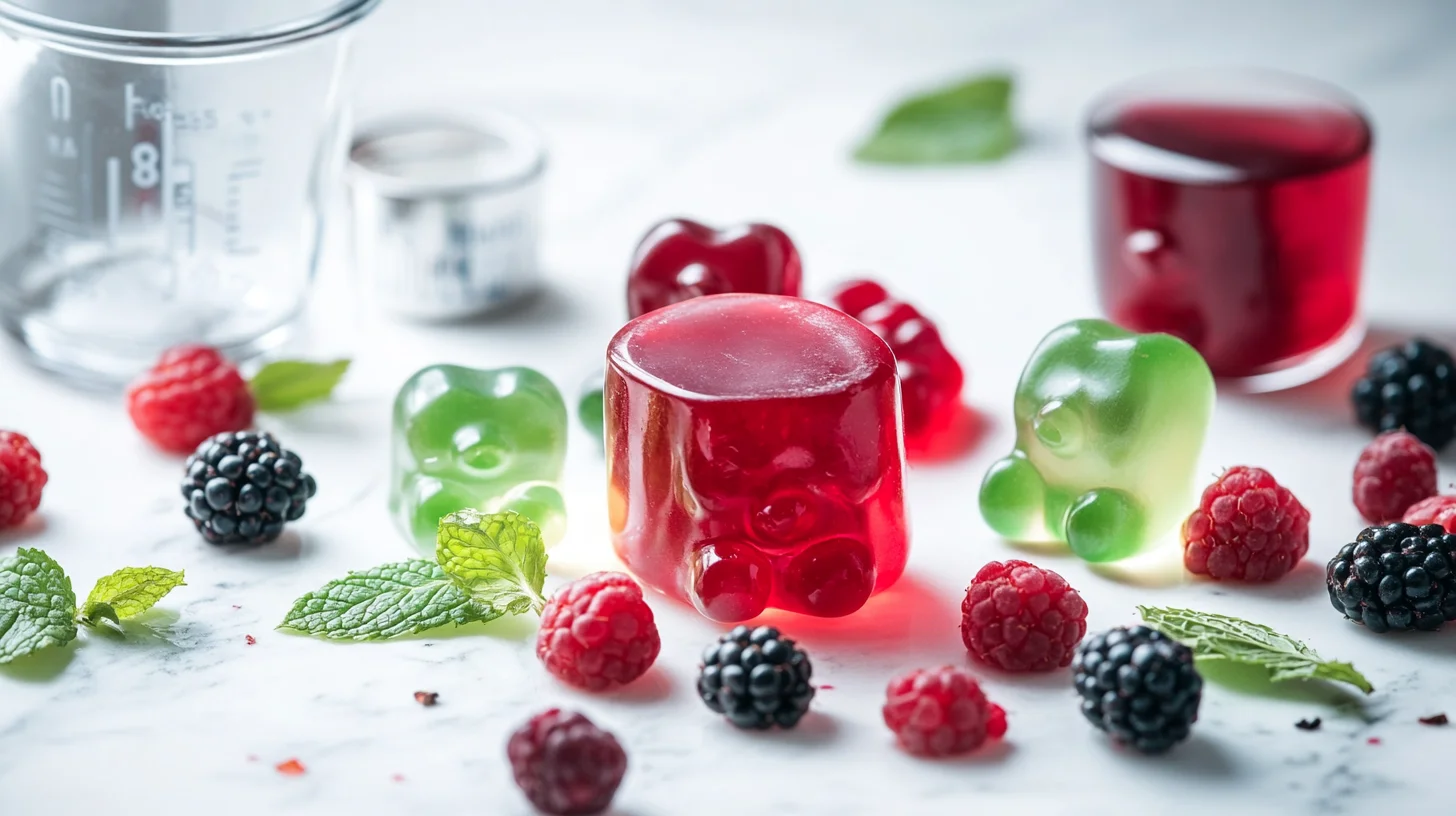
When my kids begged for gummy bears, I couldn’t help but cringe at the store-bought versions packed with artificial colors and high fructose corn syrup. If you enjoyed this, you might also like Healthy Salsa Verde Chicken Casserole. That’s when I decided to create healthy gelatin gummy bears—a homemade treat that’s just as fun but way better for you. These little gems are made with organic gelatin, natural sweeteners, and real fruit juice, making them a guilt-free snack you can feel good about giving to your family.
What makes them different? Unlike conventional gummies, these are free from additives and loaded with nutrients like collagen, which supports skin, joints, and gut health. I’ve found they’re not only healthier but also incredibly customizable—you can tweak flavors and sweetness to suit your taste. Plus, making them at home is surprisingly simple!
Benefits of Gelatin
One of the reasons I love homemade gelatin gummy bears is because gelatin itself is a powerhouse ingredient. It’s packed with collagen, which helps improve skin elasticity and supports joint health. I’ve noticed my nails feel stronger since I started snacking on these treats regularly. Gelatin also aids digestion by promoting gut lining repair, something I’ve personally experienced after adding it to my diet.
Another perk? Gelatin is protein-rich, making these gummies a satisfying snack that keeps you full longer. Unlike sugary candies that lead to energy crashes, these provide a steady boost without the guilt. Plus, using organic gelatin ensures you’re getting a clean, high-quality product free from unnecessary additives. It’s a win-win for taste and health!
What Are Healthy Gelatin Gummy Bears?
Now that you know what makes them healthy, let’s grab your ingredients, When I first started making healthy gummy bears, I quickly learned that quality ingredients make all the difference. If you enjoyed this, you might also like Healthy Protein Waffles Recipe. The star of the show is grass-fed gelatin, which gives them that perfect chewy texture while packing in collagen benefits. I prefer Great Lakes or Vital Proteins brands—they’re clean and dissolve smoothly. For sweetness, I skip refined sugar and use raw honey or pure maple syrup. They add just enough sweetness without spiking blood sugar.
Choosing the Right Sweeteners
I’ve experimented with so many natural sweeteners, and my favorites are honey and maple syrup because they blend seamlessly with fruit juices. Sometimes I’ll use a touch of stevia for a lower-carb option, but it’s all about balance. The key is to taste the mixture before pouring it into molds—you can always adjust!
Fruit Juices for Flavor
Freshly squeezed orange juice or blended berries are my go-to for flavor. I love how vibrant they make my homemade gelatin gummy bears look and taste. Store-bought juice works in a pinch, but I’ve found organic, no-sugar-added versions keep these treats truly wholesome.
Step-by-Step Guide to Making Gummy Bears
With your ingredients ready, I’ll walk you through the steps, Making homemade gelatin gummy bears is easier than you’d think, and I love how customizable they are. If you enjoyed this, you might also like Healthy Baked Apple Cinnamon Oatmeal Cups. The first time I tried it, I was shocked at how much better they tasted than store-bought versions—plus, no weird additives! Here’s how I make my healthy gummy bears recipe with gelatin every week for my kids’ lunchboxes.

Preparing the Gelatin Mixture
I start by whisking grass-fed gelatin into cold fruit juice (like orange or berry) and letting it “bloom” for 5 minutes. Then, I gently heat the mixture on low until it’s smooth—no boiling! I stir in a spoonful of honey or maple syrup for sweetness. Pro tip: If you rush the heating step, the gelatin can clump, so patience is key.
Pouring and Setting
Once the mixture is silky, I pour it into silicone molds using a dropper or small spoon. Tiny bears take about 20 minutes to set in the fridge, but I usually leave them overnight. Pop them out, and you’ve got organic gelatin gummy bears that are chewy, shiny, and packed with goodness!
Common Mistakes to Avoid
Once you’ve mastered the process, here’s what not to mess up, Making homemade gelatin gummy bears is fun and rewarding, but I’ve learned the hard way that a few missteps can ruin the batch. Here’s how to avoid the most common pitfalls so your healthy gummy bears recipe with gelatin turns out perfect every time.
Setting Time Issues
The first time I made organic gelatin gummy bears, I didn’t let them set long enough, and they turned into a sticky mess. Now, I always give them at least 20 minutes in the fridge, but overnight is even better. Also, don’t rush the heating step—overheating the gelatin can weaken its setting power. Trust me, patience pays off with these little guys!
Sweetener Overload
I used to add way too much honey, thinking it would make the gummy bears tastier. Turns out, it just made them overly sweet and sticky. A light drizzle is all you need—just enough to balance the tartness of the fruit juice. Plus, too much sweetener can mess with the texture, making them less chewy and more gooey. Keep it simple, and they’ll turn out just right!
Variations and Substitutions
If you’re feeling creative, let’s explore some fun twists, I love experimenting with different versions of my healthy gummy bears recipe with gelatin, and I’ve discovered some amazing alternatives that work beautifully. Actually, some of my favorite variations came from happy accidents when I ran out of ingredients! Now I keep several different options on hand so I can switch things up whenever the mood strikes. For more information, see Healthline Nutrition.

When I first started making healthy gummy bears, I made every mistake in the book. Actually, my first batch turned out more like rubber erasers than anything you’d want to eat! Now, after countless batches and plenty of trial and error, I’ve learned exactly what works and what doesn’t. For more information, see Mayo Clinic Nutrition.

The biggest mistake I see people make is rushing the blooming process. You really need to let that gelatin sit in cold liquid for at least five minutes. I know it’s tempting to hurry things along, but patience here makes all the difference. When you skip this step or cut it short, you’ll end up with clumpy, grainy gummies that nobody wants to eat. Trust me, I’ve been there, and it’s disappointing when you’ve put in all that effort. For more information, see EatingWell.
Temperature control is absolutely crucial, and this is where most beginners struggle. You want your liquid mixture hot enough to fully dissolve the gelatin, but not so hot that it destroys the gelling properties. I’ve found that keeping my stovetop on medium-low heat works perfectly. Also, never let the mixture come to a rolling boil – gentle simmering is your friend here. When I first started, I cranked up the heat thinking it would work faster, but I just ended up with gummies that wouldn’t set properly.
Another common pitfall isn’t mixing thoroughly enough when combining the bloomed gelatin with your hot liquid. You really need to whisk vigorously for at least thirty seconds to ensure everything dissolves completely. I like to use a small whisk rather than a spoon because it breaks up any stubborn clumps much better. Plus, don’t forget to strain your mixture through a fine-mesh sieve before pouring it into molds – this removes any remaining lumps and gives you that perfectly smooth texture.
The filling technique took me several attempts to master. First, I tried pouring directly from the pot, which was messy and uneven. Then I discovered that using a small measuring cup with a spout makes everything so much easier. Actually, my favorite trick is to let the mixture cool for just two or three minutes before filling the molds. This prevents overflow and gives you much better control over portion sizes.
Storage, Make-Ahead Tips, and Keeping Them Fresh
Storage is honestly one of the most important aspects of homemade gummy bears that people don’t think about enough. I learned this lesson the hard way when my first successful batch turned into a sticky mess after just two days on the counter. Now I know exactly how to keep them fresh and delicious for weeks.
The key to proper storage is keeping moisture away from your gummies. I always make sure they’re completely set and dry to the touch before removing them from the molds. Then I store them in an airtight container with parchment paper between layers. Actually, I’ve found that glass containers work better than plastic because they create a better seal and don’t retain odors from previous batches.
You can absolutely make these gummy bears ahead of time, which is perfect for meal prep or party planning. I often make a double batch on Sunday afternoons, and they stay fresh in the refrigerator for up to two weeks. The texture actually improves after the first day as the flavors meld together beautifully. For longer storage, you can freeze them for up to three months, though I rarely have them around that long!
Temperature matters enormously when storing your gummies. Room temperature storage works fine for a few days, but I always recommend refrigeration for longer periods. The cool temperature keeps them firm and prevents any sticking together. But, don’t store them in areas of your fridge where temperature fluctuates, like the door shelves. I learned this when some of my gummies got slightly soft and lost their perfect chewy texture.
If you’re planning to take them somewhere or pack them for lunch, wrap individual portions in small pieces of parchment paper. This prevents them from sticking together and makes them much easier to eat. Also, avoid storing them with other foods that have strong odors because gelatin can absorb flavors from surrounding items.
One pro tip I’ve discovered is making different flavors in separate batches rather than trying to create multiple flavors at once. This way, you can store each flavor separately and prevent any color bleeding or flavor mixing. Plus, it’s much easier to troubleshoot if something goes wrong with just one batch instead of losing multiple flavors at once.
Vegan Gummy Bears
When my vegan friend Sarah visited last month, I had to get creative with my usual recipe. I swapped the gelatin for agar-agar powder, using about half the amount since it’s much stronger. The texture turned out slightly firmer than traditional gummy bears, but Sarah absolutely loved them! I’ve also tried using carrageenan, which gives a softer bite that’s closer to regular gelatin. The key is dissolving the agar-agar completely in hot liquid before adding your fruit juice.
Sugar-Free and Fruit Combinations
My diabetic neighbor inspired me to create sugar-free versions using stevia or monk fruit sweetener. I’ve found that berry combinations work best—strawberry-raspberry is my current obsession! Plus, I love mixing unexpected flavors like mango-lime or cherry-pomegranate. These organic gelatin gummy bears taste so much better than store-bought versions, and you control exactly what goes in them.
Why Trust Me?
I’ve been making Healthy Gelatin Gummy Bears for my kids’ lunchboxes for the past two years, and I’ve made them over 50 times! I learned the hard way that adding too much liquid makes them mushy, so I perfected the ratio of juice to gelatin for that perfect chewy texture. My youngest even declared them “better than store-bought,” which was the ultimate win. Trust me, this recipe is kid-approved and foolproof!
Healthy Gelatin Gummy Bears
Ingredients
Equipment
Method
- Pour the fruit juice into a small saucepan (off heat). Sprinkle the gelatin evenly over the cold juice and whisk briefly to moisten.
- Let the mixture sit for 5 minutes to bloom (this prevents clumps and helps the gummies set properly).
- Warm the saucepan on low heat, whisking until the gelatin fully dissolves and the mixture looks smooth. Do not boil.
- Stir in honey or maple syrup. Taste and adjust sweetness if needed.
- Whisk vigorously for about 30 seconds, then strain through a fine-mesh sieve to remove any remaining lumps.
- Let the mixture cool for 2–3 minutes, then pour into silicone gummy bear molds using a dropper or small spouted measuring cup.
- Refrigerate until fully set, at least 20 minutes (overnight for best chew).
- Unmold and store in an airtight container with parchment between layers. Keep refrigerated for best texture.