5 Easy Steps to Amazing Crispy Baked Chicken Tenders
I’ll never forget the first time I made Crispy Baked Chicken Tenders for my family. It was a Sunday evening, and I wanted to recreate that nostalgic, crunchy goodness we all love from fried chicken tenders but without the guilt. After a few trial runs, I finally nailed the recipe, and now it’s a weekly staple in our house. If you’ve ever wondered how to get that perfect golden crust without frying, you’re in the right place. In this guide, I’ll walk you through everything you need to know to make the crispiest, most delicious baked chicken tenders at home. You’ll learn the best ingredients, step-by-step instructions, and even some clever substitutions for when you’re out of breadcrumbs. Trust me, once you try this recipe, you’ll never go back to store-bought tenders again.
Key Takeaways:
- Baking chicken tenders is healthier than frying but still delivers incredible crunch. – Panko breadcrumbs are the secret to an extra crispy crust. – Properly seasoning the chicken and breading is key to flavor. – A wire rack helps air circulate for even cooking and crispiness. – You can customize the recipe with different spices, coatings, and dips.
What Makes Crispy Baked Chicken Tenders So Good
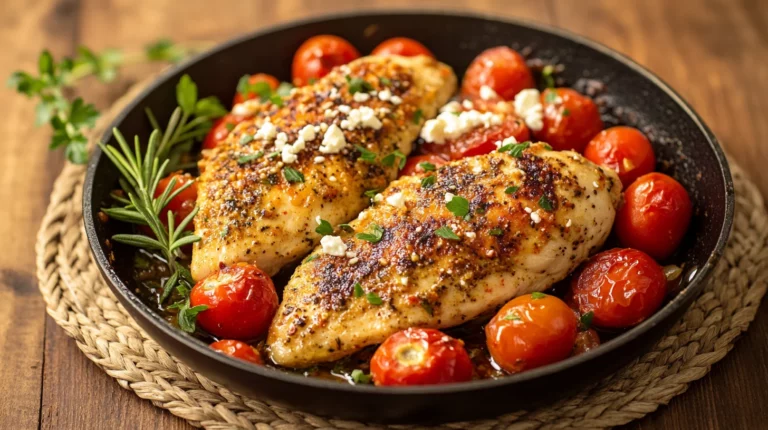
There’s something about Crispy Baked Chicken Tenders that hits all the right notes. If you enjoyed this, you might also like Creamy Lemon Butter Chicken Crispy Zucchini. They’re crunchy on the outside, juicy on the inside, and packed with flavor. Plus, they’re versatile—perfect for dipping, tossing in salads, or serving as a main dish. What I love most is how easy they are to make. You don’t need any fancy equipment or complicated techniques. Just a few simple ingredients and a little patience.
One of the best things about these tenders is how they satisfy that craving for fried food without the extra oil. Baking them allows the breading to crisp up beautifully while keeping the chicken tender and moist. It’s a win-win for anyone looking for a healthier alternative. And let’s be honest, who doesn’t love a dish that’s kid-friendly but still sophisticated enough for adults?
Why Choose Baked Over Fried
I used to think that frying was the only way to get that perfect crunch, but I was wrong. Baking chicken tenders not only cuts down on calories but also makes cleanup a breeze. No more dealing with splattering oil or lingering grease smells in the kitchen. Plus, baking gives you more control over the cooking process. You can monitor the tenders as they bake, ensuring they don’t overcook or burn.
Another reason I prefer baking is that it’s more forgiving. With frying, it’s easy to end up with unevenly cooked tenders—some burnt, some undercooked. Baking ensures even heat distribution, so every tender comes out perfectly golden. And let’s not forget the health benefits. By skipping the fryer, you’re reducing unhealthy fats while still enjoying a delicious meal.
Essential Ingredients for Crispy Baked Chicken Tenders
The key to amazing Crispy Baked Chicken Tenders lies in the ingredients. If you enjoyed this, you might also like Crispy Chicken Wonton Tacos. You don’t need anything fancy, but each component plays a crucial role. Start with boneless, skinless chicken breasts—they’re lean, easy to work with, and cook evenly. For the breading, you’ll need flour, eggs, and breadcrumbs. I always use panko breadcrumbs because they’re lighter and crispier than regular ones.

Seasoning is where you can get creative. I like to keep it simple with salt, pepper, garlic powder, and paprika, but you can add any herbs or spices you love. A little baking powder mixed into the breadcrumbs helps create extra crispiness. Finally, don’t forget the cooking spray or a light drizzle of oil to help the tenders brown in the oven.
Best Breadcrumbs for Extra Crunch
When it comes to breadcrumbs, not all are created equal. Regular breadcrumbs work fine, but panko breadcrumbs are my go-to for Crispy Baked Chicken Tenders. They’re larger and flakier, which creates a lighter, crunchier coating. I’ve also tried using crushed cornflakes or even crushed crackers for a different texture. Each option brings its own unique flavor and crunch, so feel free to experiment.
If you’re looking for a gluten-free option, almond flour or crushed gluten-free crackers work well. Just make sure whatever you use is finely ground so it adheres to the chicken properly. The breading process is simple: coat the chicken in flour, dip it in beaten eggs, and then press it into the breadcrumbs. This triple-layer technique ensures maximum crispiness.
Step-by-Step Guide to Making Crispy Baked Chicken Tenders
Making Crispy Baked Chicken Tenders is easier than you might think. If you enjoyed this, you might also like Crispy Dill Pickle Parmesan Chicken. First, preheat your oven to 400°F and line a baking sheet with parchment paper or a wire rack. This helps air circulate around the tenders, ensuring they cook evenly and stay crispy. Next, prepare your breading station. You’ll need three shallow bowls—one for flour, one for beaten eggs, and one for breadcrumbs.
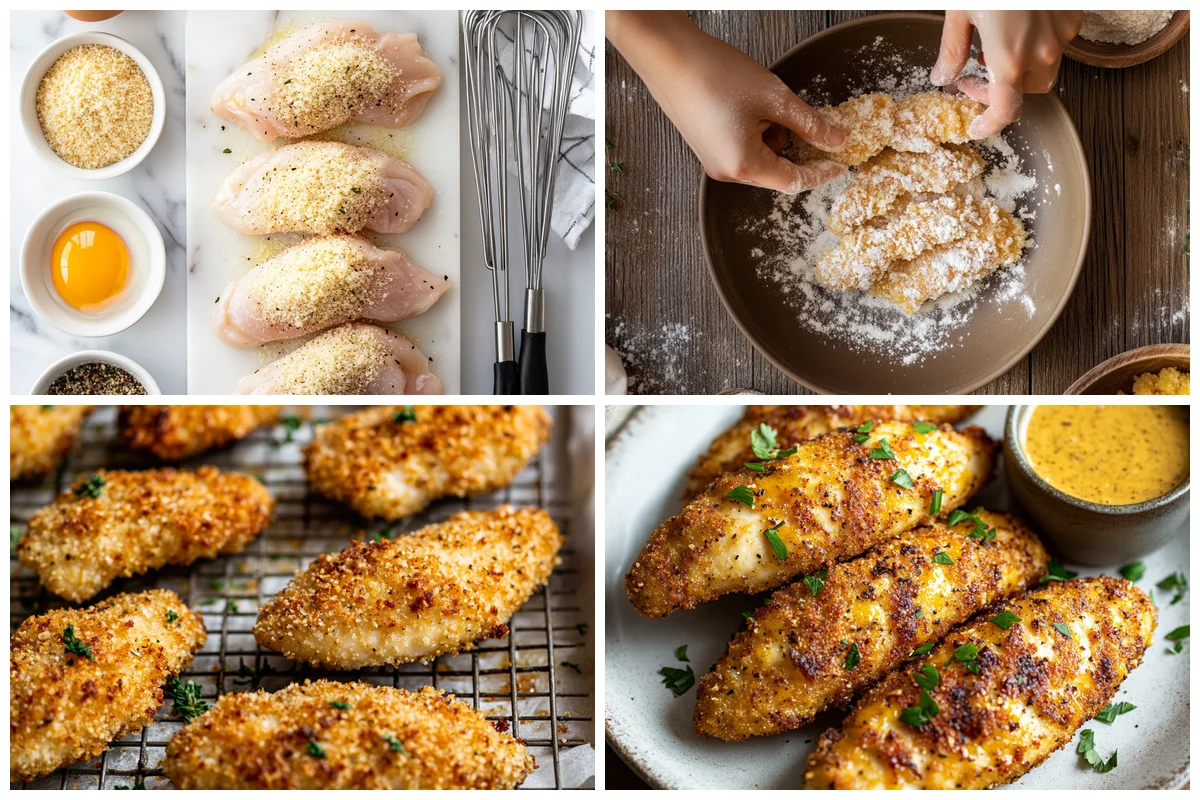
Start by cutting the chicken breasts into even strips. Season them generously with salt and pepper. Then, coat each strip in flour, shaking off any excess. Dip it into the beaten eggs, letting the excess drip off, and finally press it into the breadcrumbs, making sure it’s fully coated. Place the tenders on the prepared baking sheet, leaving space between each one. Lightly spray them with cooking oil to help them brown. Bake for 15-20 minutes, flipping halfway through, until they’re golden and crispy.
How to Get the Perfect Crust
The secret to the perfect crust is all in the technique. First, make sure your chicken strips are evenly sized so they cook at the same rate. Second, don’t skip the flour step—it helps the egg stick to the chicken, which in turn helps the breadcrumbs adhere. Press the breadcrumbs firmly onto the chicken to ensure a thick, even coating.
Another tip is to let the breaded tenders sit for a few minutes before baking. This allows the coating to set, reducing the chance of it falling off during cooking. Finally, flipping the tenders halfway through baking ensures both sides get crispy. If you want extra crunch, broil them for the last minute or two, but keep a close eye to prevent burning. For more information, see Crispy Baked Chicken Tenders.
Expert Tips for the Best Crispy Baked Chicken Tenders
Over the years, I’ve picked up a few tricks to make Crispy Baked Chicken Tenders even better. First, always use a wire rack if you have one. Elevating the tenders allows hot air to circulate around them, preventing sogginess on the bottom. Second, don’t overcrowd the baking sheet. Giving each tender enough space helps them crisp up evenly. For more information, see Crispy Baked Chicken Tenders.
Another tip is to season every layer—the flour, the eggs, and the breadcrumbs. This ensures every bite is packed with flavor. If you’re short on time, you can prep the tenders ahead of time and refrigerate them until you’re ready to bake. Just let them come to room temperature before popping them in the oven. For more information, see King Arthur Baking Guide.
Avoiding Common Mistakes
One mistake I made early on was not patting the chicken dry before breading. Moisture is the enemy of crispiness, so always pat your chicken strips with a paper towel first. Another common issue is using too much oil. A light spray is all you need—too much can make the tenders greasy instead of crispy.
Finally, don’t skip the flipping step. Turning the tenders halfway through baking ensures both sides get golden and crunchy. If you forget, you might end up with one side perfectly crispy and the other side a bit soft. Trust me, it’s worth the extra effort.
Variations and Substitutions for Crispy Baked Chicken Tenders
One of the best things about this recipe is how customizable it is. If you’re out of breadcrumbs, try crushed cornflakes, crackers, or even grated Parmesan cheese for a different twist. You can also experiment with different seasonings. Add some cayenne pepper for a spicy kick, or mix in some Italian herbs for a Mediterranean flavor.
For a gluten-free version, use almond flour or gluten-free breadcrumbs. You can even skip the breadcrumbs altogether and coat the chicken in a mixture of grated Parmesan and almond flour. It’s just as crispy and adds a delicious cheesy flavor. And if you’re looking for a low-carb option, try using crushed pork rinds instead of breadcrumbs.
No Breadcrumbs? No Problem
Don’t worry if you don’t have breadcrumbs on hand. There are plenty of alternatives that work just as well. Crushed cornflakes or crackers are my go-to substitutes. They add a nice crunch and a slightly different flavor. You can also use grated Parmesan cheese mixed with almond flour for a cheesy, crispy coating.
Another option is to use crushed potato chips or pretzels. They add a salty, savory flavor that pairs perfectly with chicken. Just make sure whatever you use is finely crushed so it sticks to the chicken properly. The possibilities are endless, so don’t be afraid to get creative.
Frequently Asked Questions
What’s the secret to crispy chicken tenders?
The secret to crispy chicken tenders is all in the breading and baking technique. Using panko breadcrumbs creates a lighter, crunchier crust than regular breadcrumbs. Coating the chicken in flour, then egg, and finally breadcrumbs ensures the coating sticks well. Baking the tenders on a wire rack allows air to circulate, preventing sogginess. Finally, flipping them halfway through baking ensures both sides get crispy.
How to get chicken to crisp in the oven?
To get chicken to crisp in the oven, start by preheating your oven to 400°F. Use a wire rack on your baking sheet to elevate the tenders, allowing hot air to circulate around them. Lightly spray the breaded tenders with cooking oil to help them brown. Bake for 15-20 minutes, flipping halfway through, until they’re golden and crispy. Broiling for the last minute or two can add extra crunch.
Is it better to bake chicken at 350 or 400 for how long?
For Crispy Baked Chicken Tenders, 400°F is the better temperature. The higher heat helps the breading crisp up quickly while keeping the chicken juicy. Bake for 15-20 minutes, flipping halfway through. At 350°F, the tenders might take longer to crisp up and could end up drying out. Always use a meat thermometer to ensure the internal temperature reaches 165°F.
How to get real good chicken tenders crispy?
For really good crispy chicken tenders, start with dry chicken—pat the strips with a paper towel before breading. Use panko breadcrumbs for extra crunch, and season every layer (flour, egg, and breadcrumbs) for maximum flavor. Bake on a wire rack at 400°F, flipping halfway through. Letting the breaded tenders sit for a few minutes before baking helps the coating set, ensuring it stays crispy.
Why Trust Me?
I’ve been making Crispy Baked Chicken Tenders every Sunday for the past three years, and I’ve perfected the recipe through trial and error. One time, I forgot to flip the tenders halfway through baking, and they came out unevenly crispy—lesson learned! My family loves this dish so much that it’s become our go-to comfort food. I’ve also experimented with different coatings and seasonings, so I know what works best for that perfect crunch.
Final Thoughts
Making Crispy Baked Chicken Tenders at home is easier than you think, and the results are absolutely worth it. Whether you’re cooking for a family dinner or meal prepping for the week, this recipe is a game-changer. It’s healthier than frying, customizable to your tastes, and delivers that satisfying crunch we all crave. I hope this guide inspires you to try it out and make it your own.

Now, I’d love to hear from you—what’s your favorite dipping sauce for chicken tenders? Let me know in the comments below!

Crispy Baked Chicken Tenders
Ingredients
Method
- Preheat oven to 400°F. Line a baking sheet with parchment paper or a wire rack.
- Cut chicken breasts into even strips. Season with salt and pepper.
- Set up a breading station: one bowl with flour, one with beaten eggs, and one with panko breadcrumbs mixed with garlic powder and paprika.
- Coat each chicken strip in flour, dip in egg, then press into breadcrumbs, ensuring full coverage.
- Place tenders on the baking sheet, leaving space between each. Lightly spray with cooking oil.
- Bake for 15-20 minutes, flipping halfway through, until golden and crispy.
- Serve immediately with your favorite dipping sauce.
Notes