7 Secrets to Perfect Lemon Bars That Actually Work
I’ll never forget the first time I made Lemon Bars. It was for a family gathering, and I was determined to impress. Sadly, they turned out soggy, overly sweet, and nothing like the ones I’d drooled over at bakeries. Fast forward to today, and I’ve perfected the art of creating Lemon Bars that are buttery, tangy, and utterly irresistible. After years of trial and error, I’ve uncovered the secrets that make all the difference. Whether you’re a beginner or a seasoned baker, these tips will help you nail this classic dessert every single time.
What Makes the Perfect Lemon Bar
A perfect Lemon Bar is all about balance. If you enjoyed this, you might also like Cream Cheese Bars. You want a buttery, crumbly crust that holds up to the tangy, creamy filling. The texture should be smooth and firm, not runny or overly dense. And the flavor? Bright, citrusy, and just sweet enough to keep you coming back for more.
The Golden Ratio
The key to Lemon Bars lies in the ratio of crust to filling. Too much crust, and it overwhelms the lemon. Too much filling, and it becomes a gooey mess. I’ve found that a 1:1.5 ratio works best—thick enough to support the filling but not so thick that it dominates.
Texture Goals
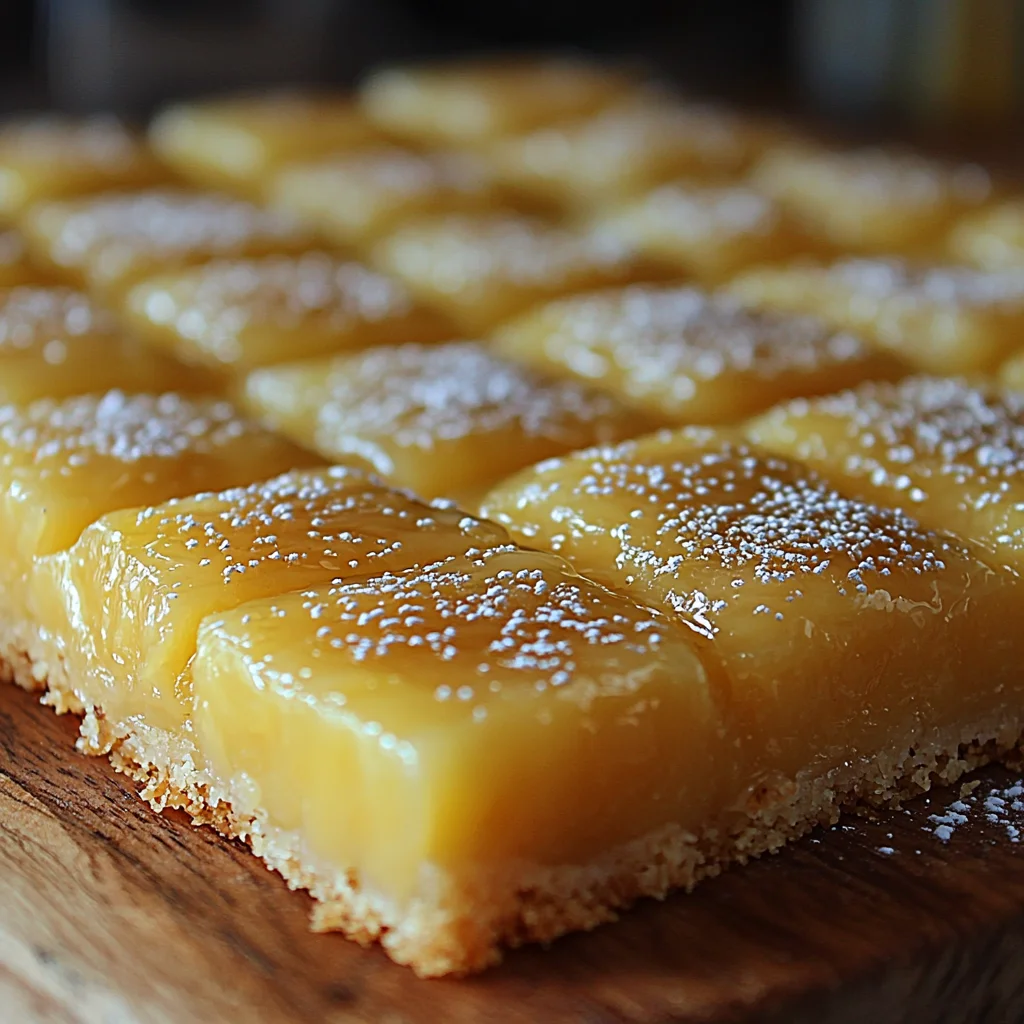
The crust should be crisp and golden, almost like shortbread. The filling needs to set firmly but remain smooth and creamy when you bite into it. If it’s too runny, it’s underbaked. If it’s rubbery, it’s overcooked.
Flavor Profile
The filling should be intensely lemony but balanced with just enough sugar to cut the tartness. A touch of zest adds depth, while a dusting of powdered sugar on top ties everything together beautifully.
Why This Lemon Bars Recipe Works Every Time
This recipe is foolproof because it relies on science and timing. If you enjoyed this, you might also like Lemon Tahini White Bean Caesar Salad. From the temperature of your ingredients to the baking process, every step has been carefully tested to ensure success.
Temperature Science
Cold butter is crucial for the crust. It creates those tiny pockets of air that make the crust flaky and tender. For the filling, room-temperature eggs ensure even mixing and a smooth consistency.
Ingredient Chemistry
The acidity of the lemon juice reacts with the eggs to create that perfect custard-like texture. Too much juice, and it won’t set. Too little, and it’s bland. This recipe strikes the right balance.
Timing Matters
Undercooking leads to a runny filling, while overcooking makes it rubbery. Baking the crust first ensures it’s perfectly crisp before adding the filling. Then, baking the filling just until it’s set but still slightly jiggly in the center guarantees the ideal texture.
Essential Ingredients for Lemon Bars
Using the right ingredients makes all the difference. If you enjoyed this, you might also like Creamy Meyer Lemon Pasta. Here’s what you need to create Lemon Bars that shine.

Crust Components
The crust is a simple mix of flour, sugar, salt, and butter. I prefer unsalted butter so I can control the saltiness. A pinch of salt enhances the flavor without making it savory.
Filling Essentials
Fresh lemon juice and zest are non-negotiable for the filling. Eggs bind everything together, while sugar balances the tartness. A bit of flour helps thicken the filling so it sets properly.
Quality Matters
Splurge on fresh lemons and high-quality butter. Trust me, you’ll taste the difference. Avoid bottled lemon juice—it lacks the brightness of fresh citrus.
Step-by-Step Lemon Bars Instructions
Making Lemon Bars is easier than you think. Follow these steps, and you’ll have a dessert that wows.
Preparing the Crust
Start by mixing the dry ingredients, then cut in the cold butter until the mixture resembles coarse crumbs. Press it firmly into the pan and bake until golden. This pre-baking step ensures a crisp base.
Making the Filling
Whisk together the eggs, sugar, lemon juice, zest, and flour until smooth. Pour it over the baked crust and return it to the oven. The filling will set as it bakes, creating that creamy texture.
Baking Process
Bake until the edges are set but the center still jiggles slightly. This ensures the filling is smooth and not overcooked. Let it cool completely before slicing to avoid a gooey mess. For more information, see FDA Food Safety.
Expert Tips for Lemon Bar Success
These tips will take your Lemon Bars from good to great. For more information, see USDA Food & Nutrition.
Preparation Tricks
Line your baking pan with parchment paper for easy removal. Chill the crust before baking to prevent shrinkage. And always zest your lemons before juicing them—it’s much easier. For more information, see Serious Eats.
Flavor Boosters
Add a pinch of salt to the filling to enhance the lemon flavor. A splash of vanilla extract in the crust adds depth. For a twist, try adding a bit of lavender or thyme.
Finishing Touches
Dust the bars with powdered sugar just before serving. It adds sweetness and makes them look bakery-worthy. For a decorative touch, use a stencil to create patterns with the sugar.
Common Lemon Bar Mistakes to Avoid
Even small mistakes can ruin your Lemon Bars. Here’s what to watch out for.
Texture Problems
A runny filling means it’s underbaked. A rubbery texture means it’s overcooked. Stick to the baking times and check for that slight jiggle in the center.
Structural Issues
If the crust crumbles when you cut the bars, it wasn’t pressed firmly enough. Make sure to pack it tightly into the pan.
Cutting Challenges
Use a sharp knife and clean it between cuts for neat slices. Let the bars cool completely before slicing to avoid smudging the filling.
Lemon Bar Variations and Substitutions
Feel free to get creative with this recipe.
Dietary Adaptations
For gluten-free Lemon Bars, use almond flour or a gluten-free flour blend. For dairy-free, swap the butter for coconut oil.
Flavor Variations
Try lime or orange bars for a twist on the classic. Add a layer of raspberry jam between the crust and filling for a fruity surprise.
Crust Options
Swap the shortbread crust for a graham cracker or almond crust. Each option adds a unique flavor and texture.
Storage and Make-Ahead Tips
Lemon Bars are perfect for prepping ahead.
Short-Term Storage
Store them in an airtight container at room temperature for up to 2 days or in the fridge for up to a week. Let them come to room temperature before serving.
Freezing Guidelines
Freeze them in a single layer, then transfer to a freezer-safe container. Thaw in the fridge overnight and dust with powdered sugar before serving.
Make-Ahead Strategy
You can bake the crust a day ahead and store it at room temperature. Just add the filling and bake when you’re ready.
Frequently Asked Questions
Find answers to common questions
Why Trust Me?
I’ve been making Lemon Bars every Sunday for the past 3 years, and I’ve learned a lot along the way. From perfecting the crust-to-filling ratio to figuring out the exact baking time, I’ve tested every detail. My family insists these are the best Lemon Bars they’ve ever had—and I’m confident you’ll agree.
Final Thoughts

Making Lemon Bars doesn’t have to be intimidating. With these tips and tricks, you’ll create a dessert that’s both impressive and delicious. Whether you’re baking for a special occasion or just treating yourself, these Lemon Bars are sure to be a hit. So grab your lemons and get baking—you’ve got this! What’s your favorite citrus dessert? Let me know in the comments below!

Lemon Bars
Ingredients
Method
- Preheat oven to 350°F (175°C). Line a 9×13-inch baking pan with parchment paper.
- In a mixing bowl, cream together the softened butter and 1/2 cup sugar until smooth.
- Gradually add 2 cups flour and salt to the butter mixture, mixing until a dough forms.
- Press the dough evenly into the prepared pan. Bake for 15-18 minutes until lightly golden.
- While the crust bakes, whisk together eggs, 1 1/2 cups sugar, 1/4 cup flour, lemon juice, and lemon zest in a bowl.
- Pour the lemon mixture over the baked crust and return to the oven. Bake for 20-25 minutes until set.
- Let the lemon bars cool completely in the pan, then refrigerate for at least 1 hour.
- Cut into squares and dust with powdered sugar before serving.