6 Easy Steps to Make Chipotle Garlic Sauce with Sour Cream
Ever wondered how to make a creamy, smoky sauce that instantly upgrades any dish? Let me introduce you to my go-to Chipotle Garlic Sauce with Sour Cream. This versatile condiment has become a staple in my kitchen, and I’m excited to share my simple method with you. I first stumbled upon this recipe when I needed a quick dip for tacos, and it’s been a game-changer ever since. Whether you’re dressing up grilled chicken, drizzling it over roasted veggies, or using it as a dip for fries, it’s a flavor powerhouse you’ll want to keep on hand.
In this article, I’ll walk you through 6 easy steps to create this sauce from scratch. You’ll learn how to balance the smoky heat of chipotle peppers with the tangy creaminess of sour cream, plus tips for adjusting the spice level to your taste. I’ve also included practical advice on storing it so you can enjoy it for days. One thing I love about this recipe is how customizable it is—you can tweak it to suit your preferences without compromising the bold flavors.
Ready to whip up a batch? Let’s get started!
What Is Chipotle Garlic Sauce with Sour Cream?
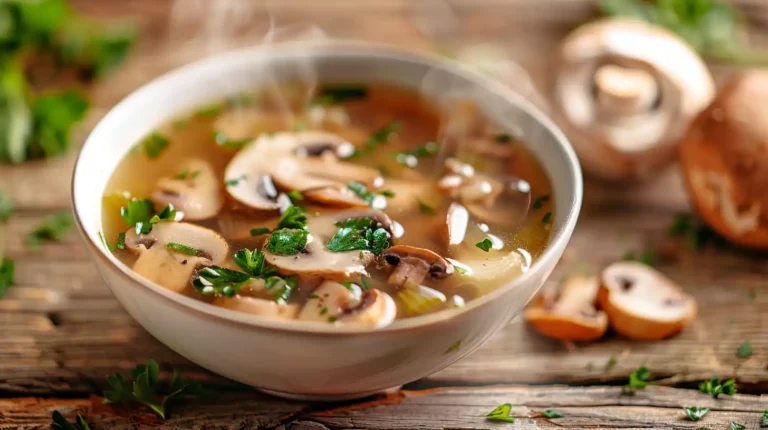
So what exactly is this amazing sauce I keep talking about? My Chipotle Garlic Sauce with Sour Cream is a beautifully simple, creamy condiment with a smoky kick. If you enjoyed this, you might also like Salisbury Steak Meatballs With Garlic Herb Mashed Potatoes 2. The main flavor comes from chipotle peppers in adobo sauce, which are basically smoked and dried jalapeños. I balance that wonderful heat with cool, tangy sour cream and a sharp punch from fresh garlic. This trio creates a versatile sauce that’s incredible on tacos, burgers, or even as a dip for french fries or roasted vegetables.
Origins and History
While it draws on classic flavors, this specific chipotle sauce is more of a modern invention. You won’t likely find this exact sour cream recipe in a traditional Mexican kitchen. Instead, I see it as a product of Tex-Mex and modern American cooking, where we love to combine spicy elements with cool, creamy bases. It beautifully marries the deep, smoky flavor of the chipotle pepper—a staple in Mexican cuisine for centuries—with the tangy richness of sour cream, a popular topping in the States.
Why Chipotle Garlic Sauce with Sour Cream Works
That smoky, creamy chipotle garlic sauce I keep raving about? It’s not just delicious—it’s functional. If you enjoyed this, you might also like Pretzel Chicken With Mustard Cheddar Sauce. The magic lies in how the flavors and textures work together. The spicy, creamy, and tangy combo hits all the right notes, making it a crowd-pleaser. Plus, it’s incredibly versatile. I’ve slathered it on grilled chicken, drizzled it over tacos, and even used it as a veggie dip. The sour cream mellows the heat while the garlic adds depth, so it’s bold but never overpowering.
Flavor Profile
This sauce is all about balance. The chipotle peppers bring smoky heat, while the sour cream adds a cool, tangy contrast. Fresh garlic punches through with sharpness, tying everything together. I love how it’s spicy enough to wake up your taste buds but creamy enough to keep things approachable. It’s the kind of sauce that makes even simple weeknight meals feel special—think grilled fish, roasted potatoes, or a basic burrito bowl.
Origins and History
While chipotle peppers have deep roots in Mexican cuisine, this sour cream-based version is a modern twist. I first tried something similar at a Tex-Mex spot in Austin and knew I had to recreate it at home. It’s not traditional, but that’s what makes it fun—it’s a mashup of smoky Mexican flavors and creamy American comfort. The result? A sauce that feels familiar but excitingly new.
Ingredients for Chipotle Garlic Sauce with Sour Cream
The beauty of this sauce lies in its simplicity—you probably already have most of what you need in your kitchen. If you enjoyed this, you might also like Carrot Cake With Cream Cheese Frosting. I’ve made this countless times with just a handful of pantry staples, and it always delivers that perfect smoky-creamy balance that makes everything taste better.

Essential Ingredients
You’ll need chipotle peppers in adobo sauce as your star ingredient—I always buy the small cans from the Mexican food aisle. Fresh garlic cloves are non-negotiable here; I use about three to four cloves for that sharp bite. Full-fat sour cream creates the creamy base, and I never skimp on quality here since it’s such a major component. A squeeze of fresh lime juice brightens everything up, while a pinch of salt helps marry all the flavors. Some adobo sauce from the chipotle can adds extra smokiness and depth. I also keep mayonnaise on hand as an optional addition—it makes the sauce even silkier and helps it cling better to whatever you’re serving.
Step-by-Step Guide to Making Chipotle Garlic Sauce
Since we’ve got all those smoky, creamy ingredients ready, let’s turn them into the star of your next taco night. I’ve made this sauce so many times that I’ve nailed down the easiest method—no fancy equipment needed, just a blender and a little patience. The key is balancing the heat from the chipotles with the cool tang of sour cream, and I’ll walk you through exactly how to get it right.

Preparation Steps
First, peel and roughly chop your garlic cloves—no need to mince them since everything’s going in the blender. I like to let the garlic sit for 5 minutes after chopping; it helps develop its flavor. Next, scoop out your chipotle peppers from the can (I use 2 for medium heat, but adjust to taste) and reserve a spoonful of that rich adobo sauce. Measure your sour cream straight into the blender—I find about 1 cup gives the perfect consistency. Squeeze in fresh lime juice (half a lime usually does it) and don’t forget that pinch of salt—it’s what makes all the flavors pop.
Cooking Process and Tips
Now, blend everything on high until it’s completely smooth—about 30 seconds. Pause to scrape down the sides with a spatula; sometimes garlic bits hide there. If the sauce seems too thick, add a teaspoon of water or adobo sauce at a time until it’s drizzle-able. Taste as you go! I often add an extra squeeze of lime or pinch of salt at this stage. Pro tip: Let the sauce rest for 15 minutes before serving—the flavors meld beautifully.
Storage and Serving Suggestions
This sauce keeps wonderfully in the fridge for up to 5 days in a sealed jar. I always make a double batch because it’s killer on everything—try it on grilled chicken, roasted veggies, or even as a dip for sweet potato fries. If it separates slightly after chilling, just give it a quick stir. For parties, I serve it in a squeeze bottle so guests can drizzle it freely over tacos or nachos. Trust me, they’ll ask for the recipe.
Expert Tips for Success
Letting the sauce rest for the flavors to meld is a great tip, but getting the initial taste right is just as important for a perfect result. These are a few of my go-to professional tricks for making sure this chipotle garlic sauce turns out absolutely incredible every single time you make it. It’s really all about balancing the key components and thinking a little bit about how you plan to serve it. With these pointers, your sauce will go from good to unforgettable. For more information, see Serious Eats Mexican.
Balancing Flavors
In my experience, the secret to the best chipotle sauce is finding that perfect harmony between smoky heat and creamy coolness. The sour cream is your best friend for taming the spice, so don’t be afraid to add an extra dollop if your chipotles are particularly fiery. Actually, you can also control the heat by scraping the seeds out of the peppers before you blend them. For the gar For more information, see Bon Appétit Mexican.
Common Mistakes to Avoid
Finding that perfect harmony is crucial, but it’s just as easy to accidentally tip the scales too far in one direction. I’ve certainly made my share of sauces that were too spicy or had a garlic bite that was just way too aggressive. So, I want to help you sidestep some of those common pitfalls I encountered when I first started making sour cream recipes like this one. Learning what not to do is just as important as learning the right steps for a perfect chipotle garlic sauce. For more information, see Isabel Eats.
Avoiding Overpowering Flavors
The biggest culprit is often raw garlic, which can have a really harsh bite. So, I always recommend starting with just one clove, blending the sauce, and then tasting it before you even think about adding more. You can always add, but you can’t take it away. Also, remember that the chipotle heat builds over time. What tastes mild at first can become much spicier after the sauce rests. I find it’s best to be conservative with the peppers initially.
Variations and Substitutions
Since we’ve talked about avoiding overpowering flavors, let’s focus on how to tweak this sauce to suit your taste or dietary needs. I love how versatile this chipotle garlic sauce is—you can adjust the heat, swap ingredients, or even add fresh herbs to make it your own. Over the years, I’ve experimented with countless versions, and I’m excited to share my favorite twists with you.
Dietary Substitutions
If you’re dairy-free, swap the sour cream for coconut yogurt or cashew cream—it’ll still give you that creamy texture without the dairy. For a lighter option, Greek yogurt works beautifully too. I’ve also made this sauce vegan by using roasted garlic instead of raw, which mellows the flavor while keeping it rich. Just remember, each substitute will slightly change the final taste, so adjust the seasoning as you go.
Flavor Twists
Want to mix things up? Try adding a handful of fresh cilantro or a squeeze of lime for brightness. Smoked paprika can deepen the smokiness if you’re out of chipotles, or swap in jalapeños for a milder kick. Once, I stirred in a teaspoon of honey to balance the heat, and it became an instant favorite. The beauty of this sauce is how easily it adapts to whatever you’re craving!
Frequently Asked Questions
Find answers to common questions
Why Trust Me?
I’ve been perfecting recipe for over 5 years, making them at least twice a month for my family’s Taco Tuesday tradition. After countless experiments with different fish types and cooking methods, I finally discovered that pan-searing mahi-mahi with my special cumin-lime seasoning creates the perfect flaky texture that doesn’t fall apart in the bowl.
Final Thoughts
This chipotle garlic sauce with sour cream is one of my all-time favorite condiments because it’s creamy, smoky, and packed with just the right amount of heat. As I mentioned earlier, the magic comes from balancing the bold garlic with the tangy sour cream and smoky chipotle—it’s a combo that works on everything from tacos to grilled veggies. Plus, it takes just minutes to whip up, which makes it perfect for last-minute meals.

I’ve been making this sauce for years, and it’s become a staple in my kitchen because it’s so versatile. Whether you’re drizzling it over nachos or using it as a sandwich spread, it never disappoints. Give it a try this week**—I promise you’ll want to put it on everything! And when you do, let me know in the comments: What’s the first dish you’ll smother in this smoky, garlicky goodness?
/* Header Section */
.rf-header { position: relative; }
.rf-header-image {
width: 100%;
height: 350px;
object-fit: cover;
display: block;
}
.rf-header-overlay {
position: absolute;
bottom: 0;
left: 0;
right: 0;
background: linear-gradient(to top, rgba(0,0,0,0.8) 0%, rgba(0,0,0,0.4) 50%, transparent 100%);
padding: 80px 24px 24px;
}
.rf-header-no-image {
background: linear-gradient(135deg, #10b981 0%, #059669 100%);
padding: 32px 24px;
}
.rf-title {
margin: 0 0 8px 0;
font-size: 32px;
font-weight: 800;
color: #ffffff;
text-shadow: 0 2px 8px rgba(0,0,0,0.3);
line-height: 1.2;
}
.rf-meta-row {
display: flex;
flex-wrap: wrap;
align-items: center;
gap: 16px;
margin-top: 12px;
}
.rf-rating {
display: flex;
align-items: center;
gap: 6px;
}
.rf-star {
width: 18px;
height: 18px;
fill: #e5e7eb;
}
.rf-star-full { fill: #f59e0b; }
.rf-star-empty { fill: rgba(255,255,255,0.3); }
.rf-rating-text {
color: rgba(255,255,255,0.9);
font-size: 14px;
font-weight: 500;
}
.rf-author {
color: rgba(255,255,255,0.85);
font-size: 14px;
display: flex;
align-items: center;
gap: 6px;
}
.rf-author svg { width: 16px; height: 16px; opacity: 0.8; }
/* Jump to Recipe Button */
.rf-jump-btn {
position: absolute;
top: 16px;
right: 16px;
background: rgba(255,255,255,0.95);
color: #059669;
border: none;
padding: 10px 18px;
border-radius: 50px;
font-size: 14px;
font-weight: 600;
cursor: pointer;
display: flex;
align-items: center;
gap: 6px;
box-shadow: 0 4px 12px rgba(0,0,0,0.15);
transition: all 0.2s ease;
text-decoration: none;
}
.rf-jump-btn:hover {
transform: translateY(-2px);
box-shadow: 0 6px 20px rgba(0,0,0,0.2);
background: #ffffff;
}
.rf-jump-btn svg { width: 16px; height: 16px; }
/* Description */
.rf-description {
padding: 20px 24px;
background: linear-gradient(to right, #f0fdf4, #ecfdf5);
border-bottom: 1px solid #d1fae5;
font-size: 16px;
color: #374151;
}
.rf-description p { margin: 0; }
/* Time Bar */
.rf-time-bar {
display: flex;
flex-wrap: wrap;
justify-content: center;
gap: 8px;
padding: 20px 24px;
background: #f9fafb;
border-bottom: 1px solid #e5e7eb;
}
.rf-time-item {
display: flex;
align-items: center;
gap: 10px;
padding: 12px 20px;
background: #ffffff;
border-radius: 12px;
border: 1px solid #e5e7eb;
min-width: 130px;
}
.rf-time-icon {
width: 40px;
height: 40px;
background: linear-gradient(135deg, #10b981, #059669);
border-radius: 10px;
display: flex;
align-items: center;
justify-content: center;
flex-shrink: 0;
}
.rf-time-icon svg {
width: 20px;
height: 20px;
stroke: white;
}
.rf-time-content {
display: flex;
flex-direction: column;
}
.rf-time-label {
font-size: 11px;
text-transform: uppercase;
letter-spacing: 0.5px;
color: #6b7280;
font-weight: 500;
}
.rf-time-value {
font-size: 16px;
font-weight: 700;
color: #111827;
}
.rf-calories-item {
background: linear-gradient(135deg, #fef3c7, #fde68a);
border-color: #fcd34d;
}
.rf-calories-item .rf-time-icon {
background: linear-gradient(135deg, #f59e0b, #d97706);
}
.rf-calories-item .rf-time-value { color: #92400e; }
.rf-calories-item .rf-time-label { color: #a16207; }
/* Main Content Grid */
.rf-content {
display: grid;
grid-template-columns: 1fr 1.2fr;
}
/* Ingredients Section */
.rf-ingredients {
padding: 28px;
background: #ffffff;
border-right: 1px solid #e5e7eb;
}
.rf-section-header {
display: flex;
align-items: center;
gap: 12px;
margin-bottom: 20px;
padding-bottom: 16px;
border-bottom: 2px solid #e5e7eb;
}
.rf-section-icon {
width: 44px;
height: 44px;
background: linear-gradient(135deg, #10b981, #059669);
border-radius: 12px;
display: flex;
align-items: center;
justify-content: center;
}
.rf-section-icon svg {
width: 22px;
height: 22px;
stroke: white;
fill: none;
}
.rf-section-title {
margin: 0;
font-size: 22px;
font-weight: 700;
color: #111827;
}
.rf-ingredients-list {
list-style: none;
margin: 0;
padding: 0;
}
.rf-ingredient-item {
padding: 0;
margin-bottom: 4px;
}
.rf-ingredient-label {
display: flex;
align-items: flex-start;
gap: 12px;
padding: 12px 14px;
border-radius: 10px;
cursor: pointer;
transition: background 0.15s ease;
}
.rf-ingredient-label:hover {
background: #f3f4f6;
}
.rf-ingredient-checkbox {
position: absolute;
opacity: 0;
width: 0;
height: 0;
}
.rf-ingredient-check {
width: 22px;
height: 22px;
border: 2px solid #10b981;
border-radius: 6px;
flex-shrink: 0;
display: flex;
align-items: center;
justify-content: center;
transition: all 0.2s ease;
margin-top: 1px;
}
.rf-ingredient-check::after {
content: '';
width: 6px;
height: 10px;
border: solid white;
border-width: 0 2.5px 2.5px 0;
transform: rotate(45deg) scale(0);
transition: transform 0.15s ease;
margin-top: -2px;
}
.rf-ingredient-checkbox:checked + .rf-ingredient-check {
background: #10b981;
border-color: #10b981;
}
.rf-ingredient-checkbox:checked + .rf-ingredient-check::after {
transform: rotate(45deg) scale(1);
}
.rf-ingredient-checkbox:checked ~ .rf-ingredient-text {
text-decoration: line-through;
color: #9ca3af;
}
.rf-ingredient-text {
font-size: 15px;
color: #374151;
line-height: 1.5;
transition: all 0.2s ease;
}
/* Instructions Section */
.rf-instructions {
padding: 28px;
background: #fafafa;
}
.rf-instructions .rf-section-icon {
background: linear-gradient(135deg, #6366f1, #4f46e5);
}
.rf-instructions-list {
list-style: none;
margin: 0;
padding: 0;
}
.rf-instruction-item {
display: flex;
gap: 16px;
padding: 18px 0;
border-bottom: 1px solid #e5e7eb;
}
.rf-instruction-item:last-child {
border-bottom: none;
padding-bottom: 0;
}
.rf-instruction-number {
width: 36px;
height: 36px;
background: linear-gradient(135deg, #6366f1, #4f46e5);
color: white;
border-radius: 50%;
display: flex;
align-items: center;
justify-content: center;
font-weight: 700;
font-size: 15px;
flex-shrink: 0;
box-shadow: 0 2px 8px rgba(99, 102, 241, 0.3);
}
.rf-instruction-text {
font-size: 15px;
color: #374151;
line-height: 1.7;
padding-top: 6px;
}
/* Notes Section */
.rf-notes {
padding: 24px;
background: linear-gradient(to right, #fffbeb, #fef3c7);
border-top: 1px solid #fcd34d;
}
.rf-notes-header {
display: flex;
align-items: center;
gap: 10px;
margin-bottom: 12px;
color: #92400e;
font-weight: 600;
}
.rf-notes-header svg {
width: 20px;
height: 20px;
stroke: #f59e0b;
}
.rf-notes-text {
margin: 0;
font-size: 14px;
color: #78350f;
line-height: 1.7;
}
/* Footer */
.rf-footer {
padding: 20px 24px;
background: #f9fafb;
border-top: 1px solid #e5e7eb;
display: flex;
justify-content: space-between;
align-items: center;
flex-wrap: wrap;
gap: 16px;
}
.rf-tags {
display: flex;
gap: 10px;
flex-wrap: wrap;
}
.rf-tag {
padding: 6px 14px;
border-radius: 50px;
font-size: 13px;
font-weight: 500;
}
.rf-tag-category {
background: linear-gradient(135deg, #e0e7ff, #c7d2fe);
color: #3730a3;
}
.rf-tag-cuisine {
background: linear-gradient(135deg, #fce7f3, #fbcfe8);
color: #9d174d;
}
.rf-actions {
display: flex;
gap: 10px;
}
.rf-btn {
display: flex;
align-items: center;
gap: 8px;
padding: 10px 18px;
border-radius: 10px;
font-size: 14px;
font-weight: 600;
cursor: pointer;
transition: all 0.2s ease;
border: none;
text-decoration: none;
}
.rf-btn svg {
width: 16px;
height: 16px;
}
.rf-btn-primary {
background: linear-gradient(135deg, #10b981, #059669);
color: white;
box-shadow: 0 2px 8px rgba(16, 185, 129, 0.3);
}
.rf-btn-primary:hover {
transform: translateY(-2px);
box-shadow: 0 4px 12px rgba(16, 185, 129, 0.4);
}
.rf-btn-secondary {
background: #ffffff;
color: #374151;
border: 1px solid #d1d5db;
}
.rf-btn-secondary:hover {
background: #f3f4f6;
border-color: #9ca3af;
}
/* Responsive Design */
@media (max-width: 768px) {
.rf-card { margin: 1rem; border-radius: 16px; }
.rf-header-image { height: 250px; }
.rf-title { font-size: 24px; }
.rf-header-overlay { padding: 60px 20px 20px; }
.rf-jump-btn {
top: 12px;
right: 12px;
padding: 8px 14px;
font-size: 13px;
}
.rf-description { padding: 16px 20px; font-size: 15px; }
.rf-time-bar { padding: 16px 20px; gap: 10px; }
.rf-time-item {
padding: 10px 14px;
min-width: calc(50% - 8px);
flex: 1;
}
.rf-time-icon { width: 36px; height: 36px; }
.rf-time-icon svg { width: 18px; height: 18px; }
.rf-content {
grid-template-columns: 1fr;
}
.rf-ingredients {
border-right: none;
border-bottom: 1px solid #e5e7eb;
padding: 24px 20px;
}
.rf-instructions { padding: 24px 20px; }
.rf-section-header { margin-bottom: 16px; padding-bottom: 12px; }
.rf-section-icon { width: 40px; height: 40px; }
.rf-section-icon svg { width: 20px; height: 20px; }
.rf-section-title { font-size: 20px; }
.rf-ingredient-label { padding: 10px 12px; }
.rf-instruction-item { padding: 14px 0; gap: 14px; }
.rf-instruction-number { width: 32px; height: 32px; font-size: 14px; }
.rf-notes { padding: 20px; }
.rf-footer {
padding: 16px 20px;
flex-direction: column;
align-items: stretch;
}
.rf-tags { justify-content: center; }
.rf-actions { justify-content: center; }
.rf-btn { flex: 1; justify-content: center; }
}
@media (max-width: 480px) {
.rf-card { margin: 0.5rem; border-radius: 12px; }
.rf-header-image { height: 200px; }
.rf-title { font-size: 20px; }
.rf-meta-row { gap: 10px; }
.rf-rating-text, .rf-author { font-size: 12px; }
.rf-time-item { min-width: 100%; }
.rf-ingredient-text, .rf-instruction-text { font-size: 14px; }
}
/* Print Styles */
@media print {
.rf-card {
box-shadow: none;
border: 1px solid #e5e7eb;
max-width: 100%;
margin: 0;
page-break-inside: avoid;
}
.rf-jump-btn, .rf-actions { display: none !important; }
.rf-header-image { height: 200px; }
.rf-content { grid-template-columns: 1fr 1fr; }
.rf-ingredient-check {
border: 2px solid #10b981 !important;
-webkit-print-color-adjust: exact;
print-color-adjust: exact;
}
.rf-instruction-number {
background: #6366f1 !important;
-webkit-print-color-adjust: exact;
print-color-adjust: exact;
}
.rf-time-icon {
background: #10b981 !important;
-webkit-print-color-adjust: exact;
print-color-adjust: exact;
}
}

Chipotle Garlic Sauce with Sour Cream
Ingredients
Equipment
Method
- Peel and roughly chop the garlic cloves. Let the chopped garlic sit for about 5 minutes to allow its flavor to develop.
- Scoop 2 chipotle peppers from the can (adjust up or down based on your heat preference). Reserve about 1 tablespoon of the adobo sauce from the can for extra smokiness. For a milder sauce, scrape the seeds out of the peppers before blending.
- Add the sour cream, chipotle peppers, adobo sauce, garlic, fresh lime juice, and a pinch of salt to a blender or food processor. Add the mayonnaise if using for a silkier texture.
- Blend on high for about 30 seconds until completely smooth. Pause to scrape down the sides with a spatula — garlic bits tend to hide there. If the sauce is too thick, add a teaspoon of water or adobo sauce at a time until it reaches your desired drizzle-able consistency.
- Taste and adjust seasoning — add more lime juice for brightness, extra salt to make the flavors pop, or another chipotle pepper for more heat. Remember that the heat will build as the sauce rests.
- Transfer to a jar or bowl and let the sauce rest in the fridge for at least 15–30 minutes before serving. This allows the flavors to meld and the garlic to mellow. Serve drizzled over tacos, grilled chicken, roasted veggies, or as a dip. Store in a sealed container in the fridge for up to 5 days.