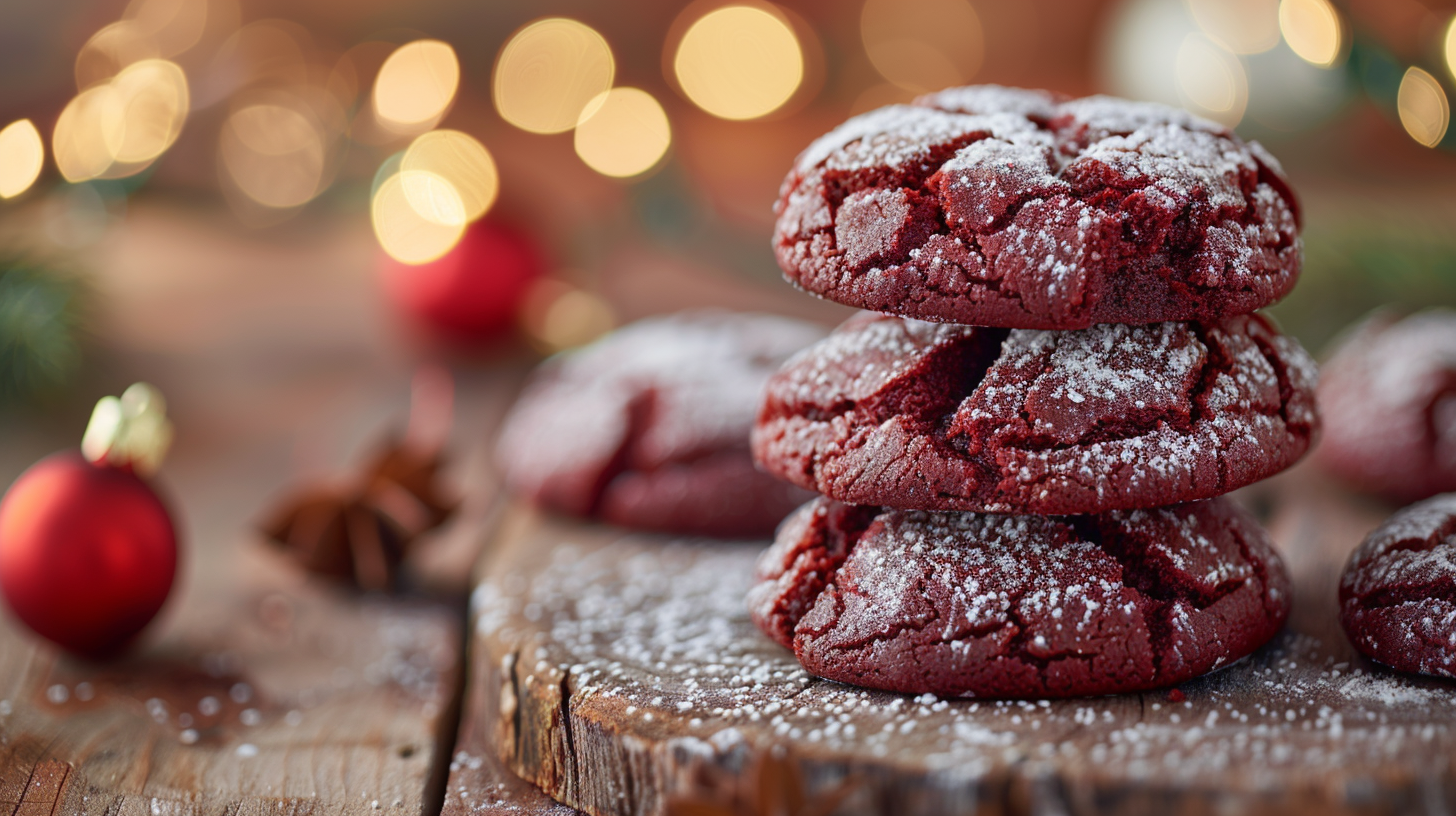
Red Velvet Crinkle Cookies – Festive, Fudgy and Perfect for Christmas
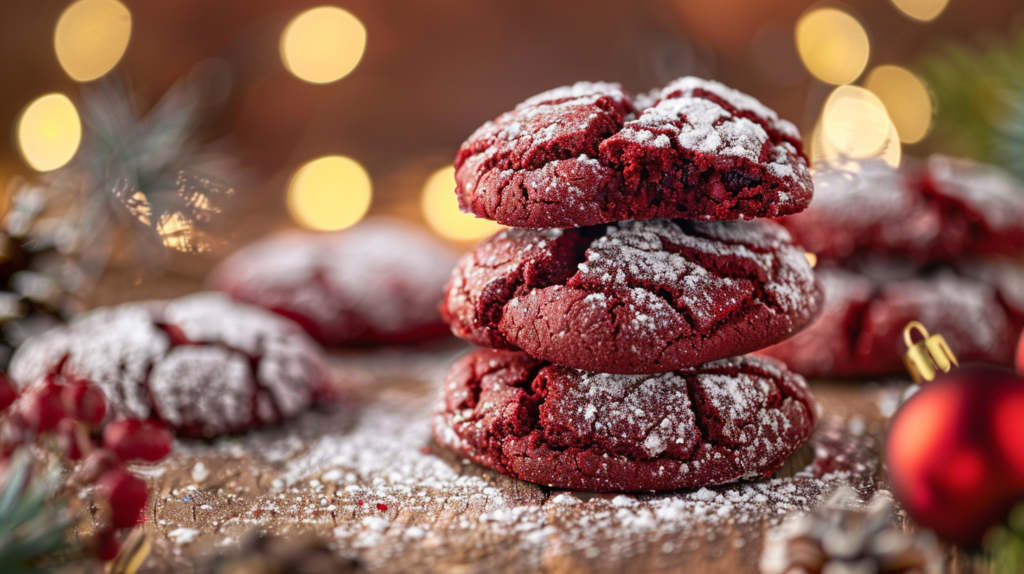
Looking for the ultimate holiday cookie that’s both stunning and delicious? These Red Velvet Crinkle Cookies bring together the rich cocoa flavor of devil’s food cake and the soft chewiness of a sugar cookie , all dressed up in a festive red hue. With their powdered sugar “snow” coating and fudgy centers, they’re perfect for Christmas dessert platters, cookie exchanges, or simply indulging in a little homemade holiday magic. If you love red Christmas cookies or red velvet recipes desserts, this one’s destined to be your new favorite.
Table of Contents
Quick Recipe Overview
| Prep Time | Chill Time | Cook Time | Total Time | Servings | Calories | Difficulty |
|---|---|---|---|---|---|---|
| 15 mins | 1 hr | 12 mins | 1 hr 30 mins | 24 cookies | 150 | Easy |
Ingredients
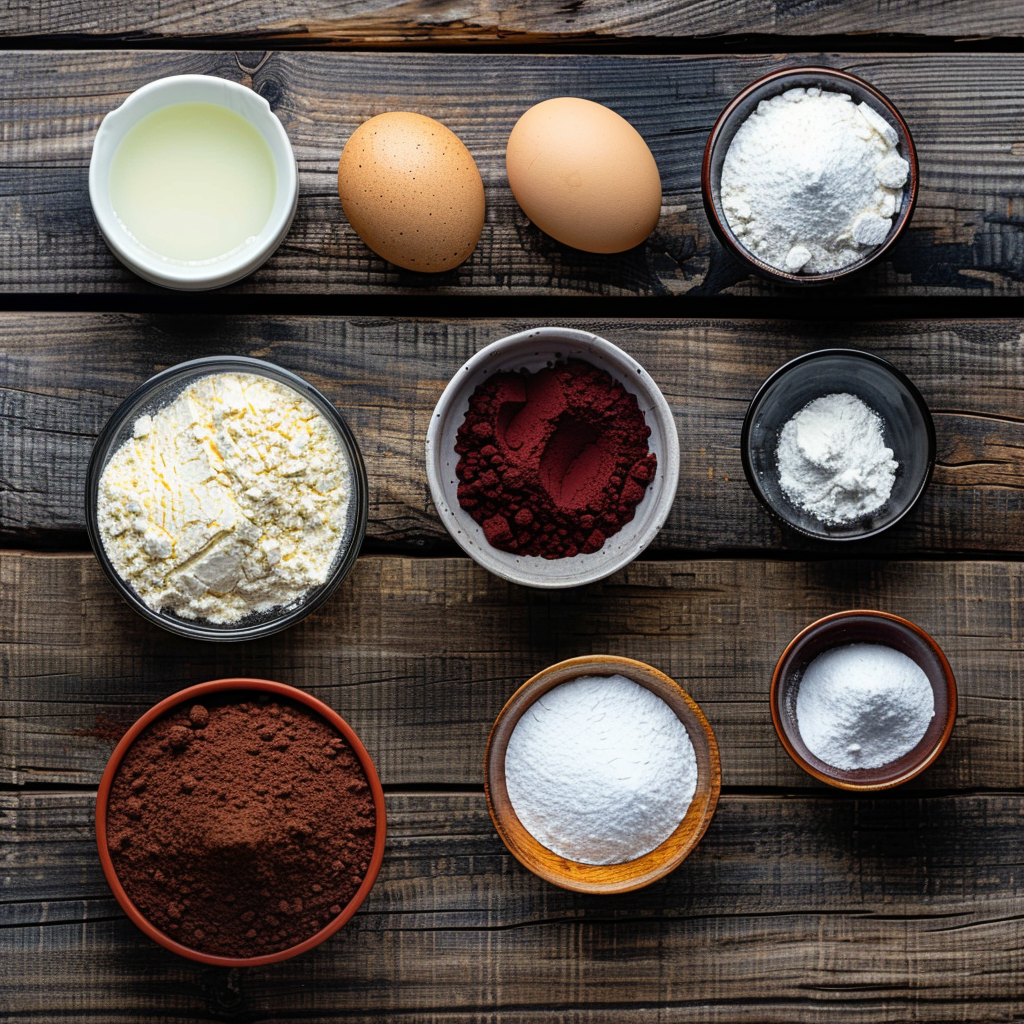
- 1 ½ cups all-purpose flour
- ¼ cup unsweetened cocoa powder (Dutch-process optional for deeper flavor)
- 1 tsp baking powder
- ¼ tsp salt
- ½ cup unsalted butter, softened
- 1 cup granulated sugar
- 2 large eggs
- 1 tsp vanilla extract
- 1 tsp white vinegar (balances color and flavor)
- 1 tbsp red food coloring (gel recommended for vibrant color)
- ½ cup powdered sugar (for rolling)
Substitution Tips:
Use natural red coloring (like beet powder) for a dye-free option. You can swap half the butter for cream cheese for an extra tangy, cake-like texture.
Step-by-Step Instructions
1. Mix the Dry Ingredients
In a medium bowl, whisk together flour, cocoa powder, baking powder, and salt until evenly combined. The cocoa gives that signature red velvet depth, so use a good-quality one.
2. Cream Butter and Sugar
In a large bowl, beat butter and granulated sugar with an electric mixer until light and fluffy. This step creates the perfect soft texture that keeps the cookies chewy inside.
3. Add Wet Ingredients
Beat in eggs, one at a time, followed by vanilla extract, vinegar, and red food coloring. The dough should look vibrant and glossy.
4. Combine Wet and Dry
Gradually add the dry mixture to the wet ingredients. Mix just until no streaks of flour remain — avoid overmixing.
5. Chill the Dough
Cover and chill for at least 1 hour. This helps the dough firm up and ensures the cookies develop those beautiful crinkle tops as they bake.
6. Coat and Bake
Preheat the oven to 350°F (175°C). Scoop dough into 1-inch balls, roll each in powdered sugar, and place on a parchment-lined baking sheet. Bake 10–12 minutes until tops are cracked and centers are soft but set.
7. Cool and Serve
Let cookies rest on the pan for 5 minutes before transferring to a rack. The sugar coating will sparkle like snow — perfect for holiday gifting!
Nutrition Facts
| Nutrient | Amount | % DV |
|---|---|---|
| Calories | 150 | 8% |
| Total Fat | 7g | 10% |
| Saturated Fat | 4g | 20% |
| Carbohydrates | 21g | 7% |
| Sugars | 14g | — |
| Protein | 2g | 4% |
Healthier or Dietary Alternatives
For a lighter version, substitute half the butter with unsweetened applesauce to reduce fat without sacrificing moisture. You can also use whole wheat pastry flour to add fiber while keeping a tender crumb.
If you prefer gluten-free red velvet crinkle cookies, swap the flour for a 1:1 gluten-free baking blend and make sure your cocoa and powdered sugar are certified GF.
Serving Suggestions
- Serve warm with a mug of peppermint hot chocolate for a cozy winter treat.
- Pair with vanilla ice cream for a red-and-white Christmas dessert duo.
- Stack and wrap with ribbon for easy edible holiday gifts.
People Also Ask (FAQ)
What makes crinkle cookies crack on top?
The powdered sugar coating dries out before the cookie finishes spreading, creating those signature crinkles as it bakes.
Can I make red velvet crinkle cookie dough ahead of time?
Yes! The dough can be chilled up to 2 days in advance or frozen for up to a month. Just thaw slightly before rolling in sugar and baking.
Why add vinegar to red velvet cookie batter?
Vinegar enhances the red color and balances the sweetness with a slight tang, giving that classic red velvet flavor profile.
Conclusion
These Red Velvet Crinkle Cookies are everything you want in a Christmas dessert — rich, fudgy, soft, and picture-perfect. Whether you’re baking for a holiday party or a cozy weekend, they’ll bring a touch of joy to every bite. Bake a batch, share them with friends, and tag your holiday creations.