6 Simple Steps to Make Amazing Candied Orange Peel Recipe
I’ll never forget the first time I tried homemade candied orange peel. My grandmother pulled a jar of these glistening citrus jewels from her pantry during a holiday cookie decorating session. The moment I tasted one, I was hooked – that perfect balance of sweet and bitter, with an intense orange flavor that store-bought versions just can’t match. Now I make big batches every winter, and I’m excited to share my foolproof method with you. This candied orange peel recipe transforms simple orange peels into something magical – perfect for baking, cocktails, or just snacking straight from the jar.
Key Takeaways:
-
- Uses just 3 simple ingredients you probably have already
-
- Removes bitterness through a special blanching process
-
- Creates versatile treats for baking and garnishing
-
- Stores beautifully for months when done right
-
- Makes fantastic homemade gift
What Is Candied Orange Peel?
Candied orange peel is exactly what it sounds like – citrus peel that’s been cooked in sugar syrup until tender and translucent, then dried until slightly crisp. If you enjoyed this, you might also like Parmesan Candied Bacon Crackers. The process transforms tough, bitter peels into sweet, aromatic treats with an incredible texture. I love how the natural citrus oils intensify during cooking, creating these little flavor bombs that make everything taste better.
What surprises most people is how versatile candied peel can be. Sure, they’re amazing eaten plain (I may or may not hide a jar in my desk drawer), but they also take baked goods to another level. I chop them into my holiday fruitcakes, stir them into biscotti dough, and use them as garnishes for cocktails. My friend Sarah even dips hers in dark chocolate for the most addictive candy you’ll ever taste.
Why Candied Orange Peel is Popular
There’s something nostalgic about candied orange peel that keeps people coming back. Maybe it’s because many of us grew up seeing them in holiday treats, or maybe it’s that satisfying contrast between the sugary coating and the slightly bitter peel underneath. Personally, I think their popularity comes from how they pack such intense flavor into small pieces – just a little bit transforms whatever you add it to.
What’s really cool is how different cultures use candied peel. Italian panettone wouldn’t be the same without it, French patisseries use it in their fruit breads, and British bakers add it to Christmas puddings. I’ve even seen bartenders use it as a fancy garnish for old-fashioned cocktails. The best part? Once you learn this basic candied orange peel recipe, you can experiment with all these uses in your own kitchen.
Why This Candied Orange Peel Recipe Works
After testing dozens of methods over the years, I’ve landed on this simple 6-step process that guarantees perfect results every time. If you enjoyed this, you might also like 3 Ingredient Orange Chicken. The secret is in the blanching – we boil the peels three times to remove bitterness without losing that bright citrus flavor. Many recipes skip this step, which is why they end up tasting harsh. We also use a precise sugar ratio that creates that ideal tender-yet-chewy texture.
What I love most about this method is how forgiving it is. Unlike finicky candy-making that requires exact temperatures, this candied orange peel recipe works even if you’re not super precise. The peels tell you when they’re ready – they become translucent and the syrup thickens just enough to coat them beautifully. I’ve taught this recipe to my 12-year-old niece, and her batches come out perfect every time.
Benefits of Homemade Candied Orange Peel
Making your own candied peel has some serious advantages over store-bought. First, you control the ingredients – no weird preservatives or artificial flavors. Second, the texture is infinitely better – homemade stays pleasantly chewy instead of turning into that weird, waxy candy you sometimes get. But my favorite benefit? The cost. You can make a huge batch for just pennies, especially if you’re using peels from oranges you’ve already eaten.
Here’s something most people don’t realize – the leftover syrup is liquid gold. After candying the peels, you’re left with this incredible orange-infused simple syrup that makes amazing cocktails or can be drizzled over pancakes. I always save mine in a squeeze bottle in the fridge. It’s amazing how one candied orange peel recipe gives you two fantastic products to enjoy.
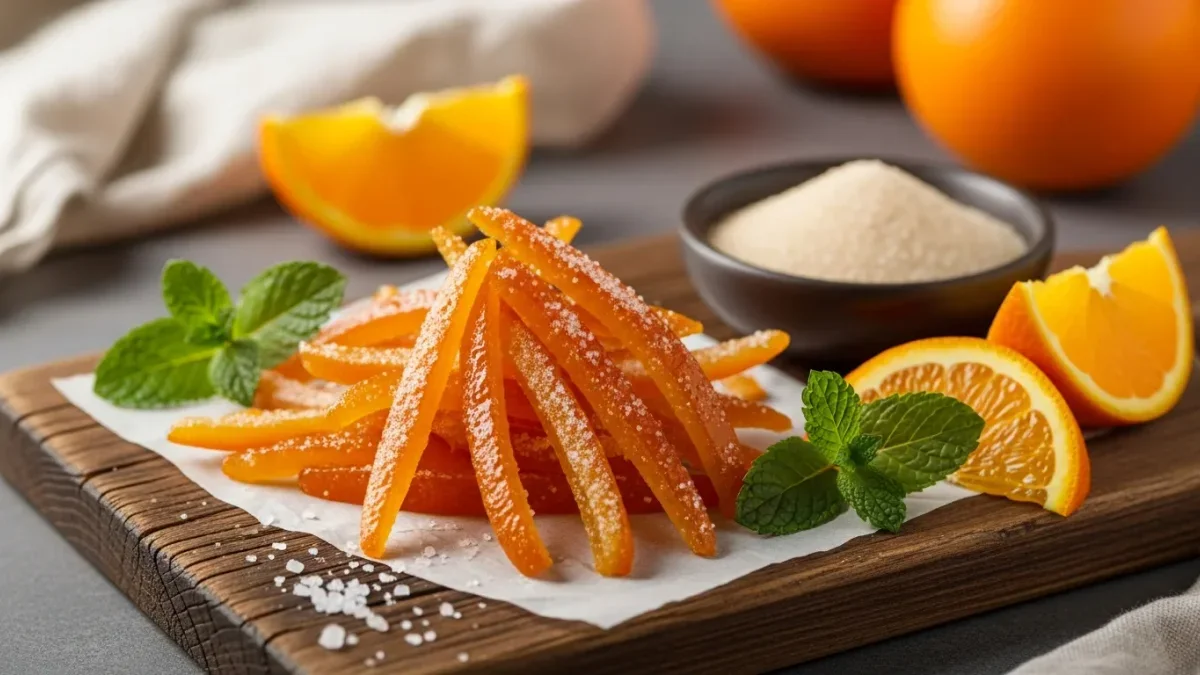
Ingredients You Need
The beauty of this recipe lies in its simplicity. If you enjoyed this, you might also like Cranberry Orange Breakfast Cake. You only need three basic ingredients:
-
- 4 large navel oranges (or 6 smaller ones)
-
- 2 cups granulated sugar
-
- 2 cups water
That’s it! Though I sometimes add a pinch of salt to balance the sweetness, and a vanilla bean or cinnamon stick to the syrup for extra flavor. If you want to get fancy, you can toss the finished peels in granulated or coarse sugar for extra crunch. I’ve also experimented with adding a tablespoon of light corn syrup to prevent crystallization, but honestly, the basic version works perfectly.
One thing I always keep on hand is a good vegetable peeler – it makes removing the peel in nice strips so much easier. You’ll also need a medium saucepan, a slotted spoon, and a wire rack for drying. I like to line my baking sheet with parchment paper too, because sticky peels can be a pain to lift off otherwise.
Choosing the Best Oranges
Not all oranges are created equal when it comes to candying. After years of testing, I’ve found navel oranges work best – their thick peels hold up well during cooking, and they have that classic sweet orange flavor. Organic is ideal since we’re using the peel, but if that’s not available, just give conventional oranges a good scrub under hot water first.
Timing matters too. Winter oranges tend to have thicker peels with more flavorful oils – perfect for this candied orange peel recipe. I avoid very thin-skinned varieties like Valencia for this purpose, as their peels can become too delicate during cooking. And size matters! Larger oranges give you more substantial pieces to work with, though smaller ones can work if you’re patient with the peeling.
Step-by-Step Guide to Making Candied Orange Peel
Now for the fun part – let’s walk through the process step by step. First, wash your oranges thoroughly since we’re using the peel. Then, using a sharp vegetable peeler, remove the zest in long strips, trying to get as little of the bitter white pith as possible. Don’t worry if you get some – our blanching process will take care of it.
Next, cut these strips into 1/4-inch wide pieces – this size cooks evenly and is versatile for various uses. Now comes the magic trick: blanching. Place the peel strips in a medium saucepan and cover with cold water. Bring to a boil, then drain immediately. Repeat this process two more times – yes, three boils total! This removes bitterness while preserving that wonderful orange flavor.
Blanching the Peels
I know boiling the peels three times sounds like overkill, but trust me, it makes all the difference. The first boil removes most of the bitterness, the second continues the process, and the third ensures we’ve gotten it all. After the third blanch, drain the peels and set them aside while you make the syrup.
For the syrup, combine 2 cups sugar and 2 cups water in the same saucepan (no need to wash it). Heat over medium until the sugar dissolves completely. Now add your blanched peels and reduce the heat to a gentle simmer. This is where patience pays off – let them cook for about 45 minutes to an hour, stirring occasionally, until the peels become translucent and the syrup reduces slightly.

Expert Tips for Perfect Candied Orange Peel
After making countless batches, I’ve picked up some tricks that take good candied peel to great. First, don’t rush the simmering process – low and slow is key for tender peels. If your syrup starts to get too thick before the peels are translucent, just add a couple tablespoons of water to thin it out. The peels are ready when they look glossy and most of the white pith has become translucent. For more information, see Candied Orange Peel.
Another pro tip: save that syrup! After removing the peels, let the syrup cool slightly, then pour it through a fine mesh strainer into a jar. It keeps for weeks in the fridge and makes incredible cocktails, lemonades, or even a sweetener for tea. I’ve even used it to glaze cakes or drizzle over ice cream – it’s that good. For more information, see FDA Food Safety.
Storing Your Candied Orange Peel
Proper storage makes all the difference in enjoying your candied peel for months. After draining the peels (save that syrup!), spread them on a wire rack set over a baking sheet. Let them dry for 4-6 hours until tacky but not sticky. At this point, you can toss them in granulated sugar if you like that extra crunch. For more information, see USDA Food & Nutrition.
For storage, I use airtight glass jars at room temperature for up to 3 months. You can also freeze them for longer storage – just layer between parchment paper in a freezer bag. Funny story – last Christmas I found a forgotten bag in my freezer from the previous year, and they were still perfect! The sugar acts as a natural preservative.
Common Mistakes to Avoid
Even with a simple recipe like this, there are a few pitfalls to watch for. The biggest mistake is skipping the multiple blanches – I learned this the hard way with my first bitter batch. Another common error is cooking the syrup at too high a temperature, which can make the peels tough. Keep it at a gentle simmer where you see occasional bubbles breaking the surface.
Timing is another area where people go wrong. If you undercook the peels, they’ll be tough; overcook them and they can become mushy. Look for that perfect translucent quality – hold a piece up to the light, and you should be able to see some light through it. And whatever you do, don’t throw away that precious syrup! It’s liquid gold in the kitchen.
Avoiding Bitterness
Bitterness is the number one complaint I hear about homemade candied peel, but it’s easily avoided. First, try to remove as much white pith as possible when peeling – a sharp peeler helps. Second, don’t skimp on the blanching steps – three boils really are necessary. Finally, use fresh, high-quality oranges. Older or stored oranges can develop more bitter flavors in their peels.
Here’s a trick I learned from a French pastry chef: after the final blanch, taste a small piece of peel. If it’s still too bitter, do one more quick blanch. The peels should have just a pleasant citrus bitterness left, like what you’d taste in good marmalade. This residual bitterness actually balances the sweetness beautifully in the finished product.
Frequently Asked Questions
How do you make candied orange peel?
The basic process involves removing orange peel in strips, blanching them multiple times to remove bitterness, then simmering in sugar syrup until tender and translucent. After draining, the peels are dried until slightly tacky. The key steps are the multiple blanches to ensure no bitterness remains and the slow simmer in syrup to develop that perfect candied texture. I like to cut my peels into uniform strips about 1/4-inch wide for even cooking.
Why are my candied orange peels bitter?
Bitterness usually comes from two sources: too much white pith left on the peel or insufficient blanching. The pith (the white layer beneath the colorful zest) contains bitter compounds that need to be removed through multiple blanchings. If your peels are bitter, try using a sharper peeler to get cleaner strips next time, and don’t skip any of the blanching steps – they make all the difference in this candied orange peel recipe.
How do you make candied orange peel Martha Stewart?
Martha Stewart’s method is actually quite similar to mine, emphasizing multiple blanches to remove bitterness. Her version sometimes includes additional flavorings like vanilla or spices in the syrup. The main difference is she often cuts her peels into thinner julienne strips, which cook faster but need more careful attention to prevent overcooking. Regardless of the exact method, the principles remain the same – remove bitterness, cook gently in syrup, and dry properly.
How long does it take to candy orange peels?
The entire process takes about 2-3 hours from start to finish, though most of that is hands-off simmering time. Active work time is about 30 minutes – peeling, cutting, and the blanching steps. The actual candying in syrup takes 45-60 minutes, followed by 4-6 hours of drying time. I often make a big batch on a lazy Sunday afternoon while doing other kitchen projects – the peels happily bubble away while I prep other things.
Why Trust Me?
I’ve been making this candied orange peel recipe for over 15 years, perfecting my method through countless batches and happy taste-testers. My candied peel has appeared in wedding favors, gourmet gift baskets, and even a local bakery’s holiday treats. More importantly, I’ve made all the mistakes so you don’t have to – from bitter first attempts to over-syruped disasters. What I share here is the foolproof method I wish I’d known when I started.
Final Thoughts
There’s something truly magical about transforming humble orange peels into glistening, jewel-like candies. This candied orange peel recipe has become one of my most treasured kitchen traditions, a process that turns simple ingredients into something extraordinary. Whether you’re adding them to baked goods, garnishing cocktails, or just enjoying them by the handful (no judgment here), homemade candied peel is worth every minute of effort.
Now that you know my secrets, I’d love to hear about your candied peel adventures! What creative uses have you discovered? Have you tried any fun variations like adding spices or dipping in chocolate? Share your experiences in the comments below – I’m always looking for new ideas to try in my next batch. Happy candying!

Candied Orange Peel
Ingredients
Method
- Wash oranges thoroughly. Using a vegetable peeler, remove zest in long strips, avoiding white pith.
- Cut zest into 1/4-inch wide strips. Place in saucepan, cover with water, and bring to boil. Drain and repeat twice more.
- In same saucepan, combine sugar and water. Heat until sugar dissolves, then add blanched peels.
- Simmer gently for 45-60 minutes until peels are translucent and syrup has thickened slightly.
- Remove peels with slotted spoon, letting excess syrup drip off. Spread on wire rack to dry for 4-6 hours.
- Optional: Toss in granulated sugar while still slightly sticky. Store in airtight container.