7 Simple Ways to Make an Amazing Beginner Sourdough Starter
Have you ever caught a whiff of fresh sourdough bread baking and wished you could make it yourself? I remember the first time I tried my hand at a Beginner Sourdough Starter—it felt like magic. I was nervous, convinced I’d mess it up, but I followed some simple steps, and before I knew it, I had a bubbly, active starter ready to bake with. Now, I’m here to show you it’s easier than you think.
Creating a sourdough starter from scratch doesn’t have to be intimidating. In fact, it’s one of the most rewarding kitchen projects you’ll ever try. All you need is flour, water, and a little patience. I’ve learned a lot over the years—what works, what doesn’t, and how to keep your starter happy and thriving. Whether you’re a complete beginner or someone who’s tried and struggled before, I’ve got you covered.
In this guide, I’ll walk you through 7 simple ways to make an amazing Beginner Sourdough Starter. You’ll learn how to choose the right flour, maintain the perfect feeding schedule, and troubleshoot common issues. Plus, I’ll share my favorite tips for keeping your starter alive and active. Trust me, once you taste that first loaf of homemade sourdough, you’ll be hooked. Let’s get started!
What Is a Beginner Sourdough Starter?
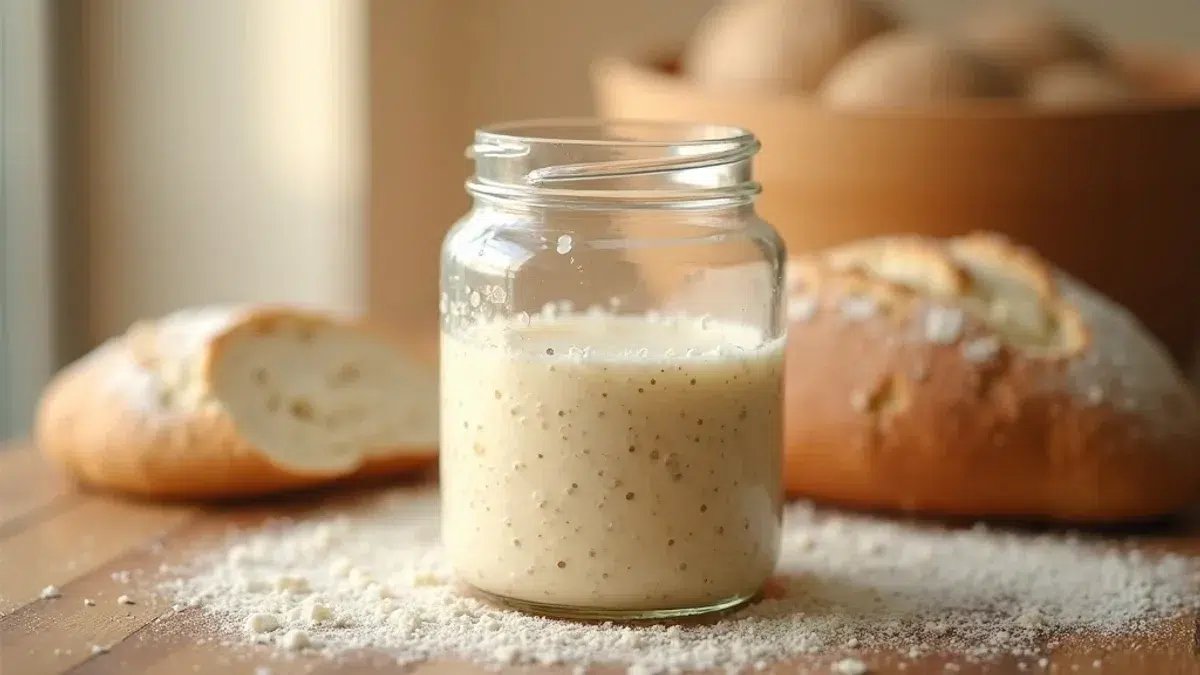
When I first heard about sourdough starters, I honestly thought they sounded like some mystical kitchen creature that only expert bakers could handle. If you enjoyed this, you might also like Cheesy Sour Cream Chicken. But here’s the truth I wish someone had told me back then: a beginner sourdough starter is simply a living mixture of flour and water that captures wild yeast from the environment around you. That’s it! No fancy equipment, no special ingredients from expensive stores, just two basic pantry staples working together to create something magical.
Think of your starter as a friendly pet that lives in your kitchen. I’ve had mine for three years now, and I’ve named her Bubbles because she gets so excited when it’s feeding time. A sourdough starter is essentially a culture of wild yeast and beneficial bacteria that you’ll feed regularly with fresh flour and water. These microorganisms break down the starches in flour, creating lactic acid and acetic acid that give sourdough its distinctive tangy flavor. The wild yeast also produces carbon dioxide, which makes your bread rise naturally without commercial yeast.
The beauty of making your own beginner sourdough starter lies in its simplicity. You don’t need any special beginner sourdough starter kit or expensive tools. I started mine with basic all-purpose flour and tap water in a mason jar I had lying around. The flour provides food for the microorganisms, while the water creates the perfect environment for fermentation to happen. Over time, your starter develops its own unique personality based on the flour you use, your local environment, and even the specific wild yeasts floating around your kitchen.
Understanding the Fermentation Process
Now, let me walk you through what’s actually happening inside that jar of flour and water. The fermentation process starts almost immediately when you mix your first batch. Wild yeast spores are everywhere – on the flour, in the air, even on your hands. When you create the right conditions with moisture and food, these tiny organisms wake up and start working their magic.
During the first few days, you might notice your starter smells a bit funky. Don’t panic! I remember calling my mom in a complete frenzy because my starter smelled like old gym socks on day three. She laughed and told me that’s completely normal. What’s happening is that different types of bacteria are competing for dominance in your starter. The less desirable ones often show up first, creating those weird smells, but they’ll eventually be crowded out by the good guys.
The beneficial bacteria I mentioned earlier – mainly lactobacillus – produce acids that lower the pH of your starter. This acidic environment becomes hostile to harmful bacteria while creating the perfect home for wild yeast to thrive. It’s like nature’s own quality control system! As the days pass, you’ll notice your starter becomes more predictable. It’ll start doubling in size within 4-8 hours of feeding, develop a pleasant yeasty aroma, and create a network of bubbles throughout.
The most exciting part of understanding fermentation is realizing you’re working with a living ecosystem. Every time you feed your starter, you’re supporting millions of tiny organisms that are working together to create something delicious. My beginner sourdough starter tips always include being patient with this process – good fermentation can’t be rushed, but the results are absolutely worth the wait.
Why a Sourdough Starter Matters
Moving on, I remember the first time I baked with my own beginner sourdough starter—it was like unlocking a secret level in baking. If you enjoyed this, you might also like Cranberry Brie Tart. The bread had this tangy, complex flavor that store-bought yeast could never replicate, and the texture? Chewy, airy, and just better. But sourdough isn’t just about taste—it’s a game-changer for your health, your kitchen creativity, and even your connection to food. Let me break down why this bubbly jar of flour and water deserves a permanent spot on your counter.
Health Benefits of Sourdough
When I switched to sourdough, I noticed my stomach felt happier after meals. Turns out, there’s science behind that. The long fermentation process in a beginner sourdough starter recipe breaks down gluten and phytic acid, making it easier to digest. My friend with gluten sensitivity can even tolerate my sourdough bread, though she struggles with regular loaves. The lactic acid bacteria (those hardworking little microbes) also produce nutrients like B vitamins and antioxidants.
Plus, sourdough has a lower glycemic index than commercial bread. I’ve seen my energy levels stay steadier since making the switch—no more mid-morning crashes. And let’s talk about probiotics. While baked sourdough doesn’t retain live cultures, the fermentation still supports gut health by pre-digesting starches. My beginner sourdough starter tips always include this: even if you’re not into bread, you can use the discard for pancakes or crackers to sneak those benefits into your diet.
Flavor, Texture, and Versatility
The first bite of my homemade sourdough made me realize I’d been missing out. That signature tang? It comes from the acetic acid produced during fermentation, and it deepens over time. My starter’s flavor changes with the seasons too—warmer weather brings out fruitier notes, while winter yields a mellower taste. And the texture? Crackly crust, open crumb, and a chew that’s downright addictive.
But here’s the fun part: a beginner sourdough starter kit isn’t just for bread. I’ve used mine for fluffy waffles, chewy bagels, and even chocolate cake (trust me, it works). The starter’s acidity tenderizes doughs, giving pizza crusts a crisp bite and English muffins those perfect nooks. Last week, I stirred discard into muffin batter, and my kids devoured them—no one guessed the secret ingredient.
The best part? Once you’ve got an active starter, it becomes your kitchen sidekick. Mine’s named “Bubbles,” and after two years, it’s survived cross-country moves and accidental neglect. With a little flour and water, it bounces back every time. So if you’re on the fence about starting one, just go for it. The flavor, health perks, and creative possibilities make it worth the small effort. And hey, if I—a former microwave-meal addict—can do it, you’ve totally got this.
Essential Ingredients for a Beginner Sourdough Starter
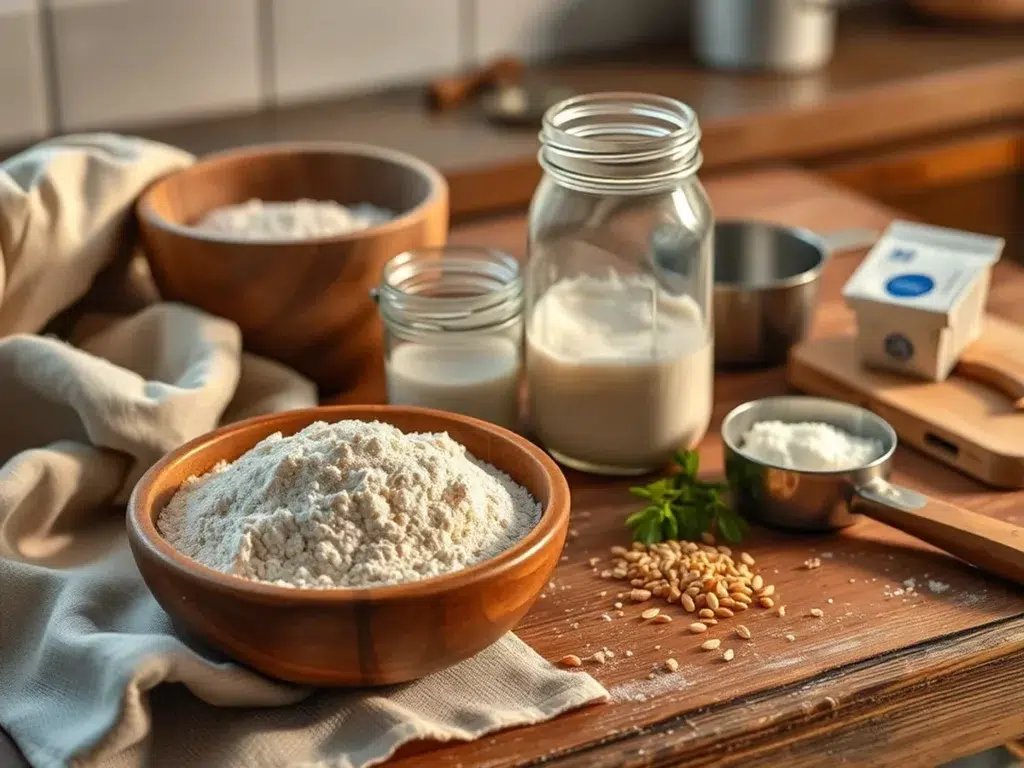
Now that we’ve covered that, Creating your first beginner sourdough starter feels intimidating until you realize it only needs two simple ingredients. If you enjoyed this, you might also like Chipotle Garlic Sauce Sour Cream. That’s right—just flour and water. When I started my journey three years ago, I overthought everything and bought expensive specialty flours. Then my neighbor showed me her thriving starter made with basic all-purpose flour from the grocery store. Sometimes the simplest approach works best.
The beauty of a beginner sourdough starter recipe lies in its minimalism. You don’t need fancy equipment or exotic ingredients. I’ve watched friends stress about finding the “perfect” flour while their starter sits unmade on the counter. Meanwhile, I’m over here feeding my trusty starter with whatever flour I’ve got on hand. Actually, this flexibility makes sourdough accessible to everyone, regardless of budget or location.
Water quality matters more than most people think. I learned this the hard way when my first starter died after two weeks of using heavily chlorinated tap water. The chlorine kills the beneficial bacteria you’re trying to cultivate. Now I use filtered water, though letting tap water sit overnight works too—the chlorine evaporates naturally. Plus, room temperature water keeps your starter happy and active.
Choosing the Right Flour
All-purpose flour works perfectly for beginners, despite what fancy baking blogs might tell you. I’ve maintained healthy starters using store-brand all-purpose flour for years. The key is consistency—stick with one brand once you find what works. Different brands have varying protein content, and switching constantly confuses your starter’s ecosystem.
Whole wheat flour accelerates fermentation because it contains more nutrients for wild yeast. When I want to revive a sluggish starter, I add a tablespoon of whole wheat to my regular feeding. The natural enzymes jump-start activity within hours. But, don’t use only whole wheat—it creates dense, overly sour starters that beginners find challenging to manage.
Bread flour creates solid starters with excellent gluten development, perfect if you plan to make lots of bread. I switched to bread flour after six months and noticed my starter became more predictable. The higher protein content strengthens the gluten network, giving your starter better structure. This translates to better bread later.
Rye flour acts like rocket fuel for starters. Just a small amount mixed with all-purpose flour creates incredibly active cultures. I add rye once weekly to keep things lively. But here’s my beginner sourdough starter tip—start with all-purpose flour first. Master the basics before experimenting with specialty flours.
Organic flour isn’t necessary, though some swear by it. I’ve used both organic and conventional flours with equal success. What matters more is freshness—old flour creates weak starters. I buy flour from stores with high turnover and store it properly in airtight containers.
Temperature affects flour choice too. In my hot kitchen during summer, all-purpose flour works perfectly. But in winter, I sometimes add a pinch of whole wheat to compensate for slower fermentation. Actually, this seasonal adjustment becomes second nature once you understand your starter’s rhythms. The flour you choose sets the foundation, but consistency in feeding and care determines success.
Step-by-Step Guide to Making a Sourdough Starter
Now that we’ve covered that, Creating your first sourdough starter feels intimidating, but I promise it’s simpler than you think. I’ve guided hundreds of beginners through this process, and honestly, the starter does most of the work itself. You just need to show up consistently with flour and water. So let’s walk through this together, day by day, until you’ve got a bubbling, active starter ready for bread making.
First, gather your supplies. You’ll need a clean glass jar (I use mason jars), all-purpose flour, filtered water, and a wooden spoon or spatula. Actually, tap water works fine unless yours is heavily chlorinated. I learned this the hard way when my first starter failed because I obsessed over using only bottled water. Now I just let tap water sit overnight to let chlorine evaporate.
Day 1: Getting Started
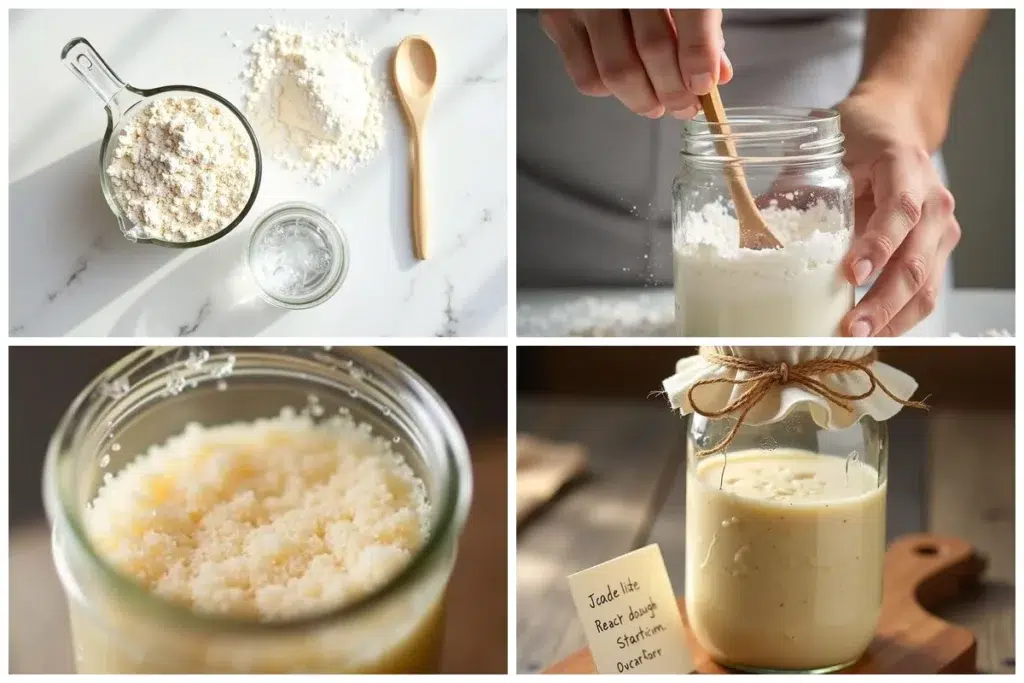
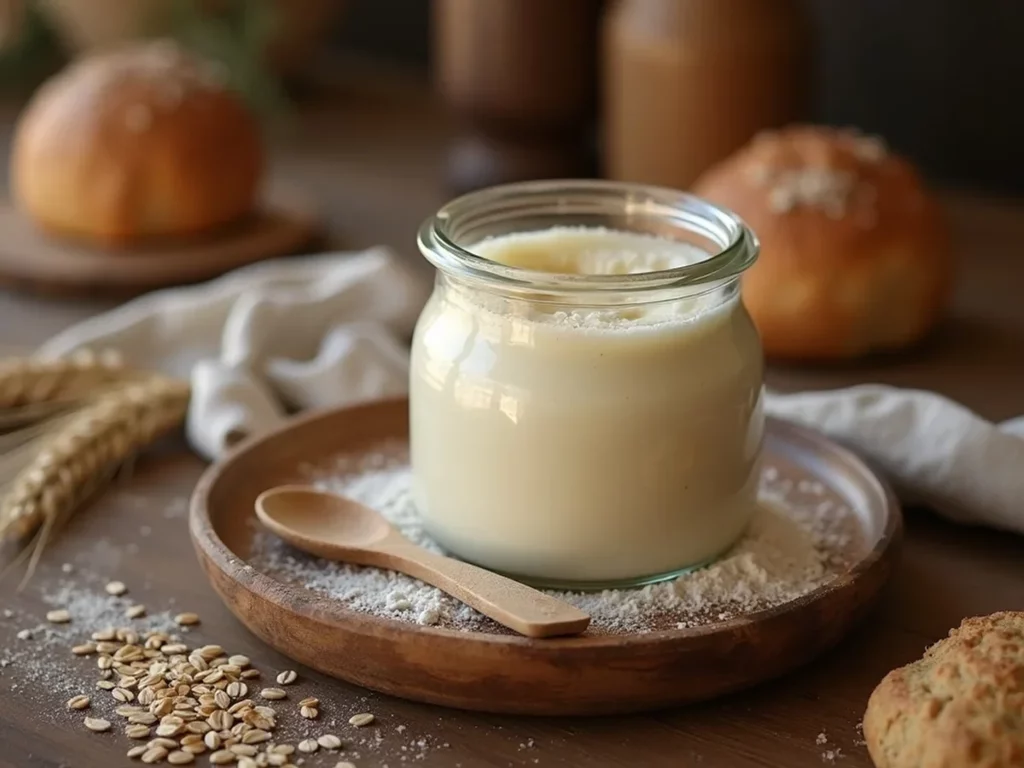
Today marks the beginning of your sourdough journey, and I still remember the excitement I felt starting my first batch. Mix 50 grams of all-purpose flour with 50 grams of room temperature water in your jar. The mixture should look like thick pancake batter. Don’t worry if it seems lumpy at first—just stir until you don’t see dry flour streaks.
Cover your jar loosely with a lid or cloth. I prefer using a coffee filter secured with a rubber band because it allows airflow while keeping dust out. Place your starter somewhere warm but not hot. My kitchen counter works perfectly, though I avoid spots near the stove or in direct sunlight.
Next, you’ll wait. Nothing dramatic happens on day one, though you might notice a slightly sweet, flour-like smell. That’s completely normal. Some beginners expect immediate bubbling, but wild yeast needs time to establish itself. I always tell new starter parents that patience is your most important ingredient.
The consistency should remain thick but stirrable. If it seems too dry, add a teaspoon of water. Too wet? Sprinkle in a bit more flour. Actually, perfect consistency isn’t crucial at this stage. I’ve seen successful starters that started thick as paste and others that looked more like soup.
Temperature affects timing significantly. In my experience, starters develop faster in warm kitchens (75-80°F) and slower in cool ones. Don’t stress if your kitchen runs cold—your starter will just take longer to show activity. I’ve successfully started cultures in winter kitchens that took nearly two weeks to become active.
Mark your jar with today’s date and time. This helps track progress and establishes your feeding schedule. Plus, there’s something satisfying about documenting this process. I still have photos of my first starter from day one, looking like plain flour paste, compared to its bubbly glory weeks later.
Finally, resist the urge to stir or disturb your starter today. Wild yeast needs time to settle in and begin working. Think of it like planting seeds—you don’t dig them up to check for roots every few hours. Your beginner sourdough starter is quietly beginning its transformation, even though you can’t see it yet.
Expert Tips for Sourdough Starter Success
Now, Creating your first sourdough starter feels overwhelming, but I’ve learned that success comes down to consistency and patience. After maintaining my own starter for three years and helping dozens of friends start theirs, I’ve discovered the secrets that separate thriving cultures from abandoned jars in the back of fridges.
Maintaining Consistency
The biggest mistake I see with beginner sourdough starter maintenance is irregular feeding schedules. Your starter thrives on routine, just like any living organism. I feed mine every 12 hours when it’s active, and I stick to this schedule religiously. Set phone alarms if you need to—I did for the first month until it became second nature.
Temperature consistency matters more than most people realize. My kitchen fluctuates between 68°F in winter and 78°F in summer, so I’ve learned to adjust accordingly. During cold months, I place my starter on top of the refrigerator where it stays slightly warmer. Actually, I once tried keeping it near a heating vent and nearly killed it from overheating. Now I use a simple thermometer strip on the jar to monitor temperature. For more information, see Sourdough Starter Recipe.
Water quality can make or break your starter’s development. I switched from tap water to filtered water after my first attempt failed miserably. Chlorine in municipal water systems kills the wild yeast you’re trying to cultivate. If you don’t have a filter, let tap water sit out overnight so the chlorine evaporates. This simple change transformed my starter from sluggish to vibrant within a week. For more information, see Molds On Food: Are They Dangerous?.
Flour consistency is equally crucial for beginner sourdough starter tips. I always use the same brand and type of flour for feeding. Switching between different flours confuses the microbial balance you’re building. My starter loves King Arthur bread flour, but yours might prefer whole wheat or rye. Find what works and stick with it. For more information, see FDA Food Safety.
The feeding ratio matters tremendously. I use equal weights of starter, flour, and water (1:1:1 ratio). This consistency helps predict when your starter will peak. Some recipes suggest different ratios, but I’ve found this approach most reliable for beginners. Don’t worry if you accidentally add too much water one day—your starter is more forgiving than you think.
Room for growth is something I learned the hard way. My first jar overflowed onto the counter because I didn’t account for the starter doubling in size. Now I use a jar that’s at least three times larger than my starter amount. Mark the starting level with a rubber band so you can track growth patterns.
Stirring technique might seem trivial, but it affects oxygenation. I use a clean wooden spoon and fold the mixture gently rather than beating it aggressively. This incorporates air without destroying the delicate structure that’s developing. Actually, I’ve noticed that gentle stirring produces more consistent bubbling patterns.
Documentation helps tremendously with troubleshooting. I keep notes about feeding times, starter behavior, and environmental conditions. This record helped me identify that my starter becomes sluggish during barometric pressure changes before storms. Your starter might have different quirks, and notes help you learn its personality over time.
Common Mistakes to Avoid with Sourdough Starters
Next up, Creating your first sourdough starter feels exciting until you make those rookie mistakes that leave you wondering what went wrong. I’ve been there, watching my starter turn into something resembling science experiment gone bad instead of the bubbly, fragrant culture I’d envisioned. Let me share the pitfalls I’ve stumbled into so you can sidestep them entirely.
Temperature swings wreaked havoc on my early starters because I didn’t realize how sensitive these cultures actually are. I’d move my jar from the warm kitchen counter to the cool pantry without thinking twice. Then I’d wonder why my starter seemed sluggish one day and hyperactive the next. Now I keep my beginner sourdough starter in the same spot consistently, away from heating vents and drafty windows.
Contamination happened more often than I’d like to admit when I first started this journey. I’d use the same spoon for multiple tasks or forget to wash my hands properly before handling the starter. Once, I accidentally used a wooden spoon that still had garlic residue from dinner prep. My poor starter developed off-flavors that took weeks to correct. Clean utensils and hands aren’t just suggestions – they’re absolutely critical for success.
Water quality made a huge difference once I figured out the connection. My tap water contains chlorine, which kills the beneficial bacteria you’re trying to cultivate. I learned this lesson when my starter kept failing despite following every beginner sourdough starter recipe perfectly. Now I use filtered water exclusively, and the difference in starter vitality is remarkable.
Avoiding Overfeeding
Overfeeding your starter sounds impossible until you realize it’s one of the most common beginner mistakes. I used to think more food meant a happier, stronger culture, so I’d dump extra flour into my jar whenever I remembered. This actually dilutes the acidity that protects your starter from harmful bacteria and creates an environment where bad microorganisms can take hold.
The feeding ratio matters tremendously, and I learned this through trial and error with several failed batches. When you feed your starter equal parts flour and water by weight, you’re maintaining the proper balance of food and existing culture. I made the mistake of eyeballing measurements early on, which led to inconsistent results and frustrated tears.
Timing your feedings requires more attention than most beginner sourdough starter tips mention. I used to feed my starter whenever I remembered, sometimes twice in one day, other times forgetting for three days straight. This irregular schedule confused my poor starter’s ecosystem. Now I feed at the same time each day, which has created much more predictable behavior patterns.
Temperature affects how quickly your starter consumes its food, something I didn’t understand initially. During summer heat waves, my starter would eat through its flour much faster than in winter months. I kept feeding on the same schedule year-round, which meant overfeeding during cool weather and underfeeding during warm spells. Learning to read your starter’s hunger cues through bubble activity and aroma helps you adjust feeding frequency appropriately.
Consistency in flour type prevents the shock that comes from constantly changing your starter’s diet. I experimented with different flours weekly during my early days, switching between whole wheat, rye, and all-purpose without considering the impact. Each flour feeds different bacterial strains, so constant changes create instability in your culture’s development.
Variations and Substitutions for Sourdough Starter
Actually, I discovered that different flours create completely unique starter personalities, each with distinct flavors and fermentation speeds. When I first started my beginner sourdough starter recipe journey, I assumed all flour was basically the same. Boy, was I wrong! My original all-purpose flour starter produced mild, slightly tangy loaves that pleased everyone at family dinners.
Then I got adventurous and created a whole wheat starter using King Arthur’s whole wheat flour. This darker culture developed much faster than my white flour version, bubbling vigorously within hours of feeding. The resulting bread carried deeper, nuttier flavors that reminded me of my grandmother’s homemade loaves. Plus, whole wheat starters tend to attract wild yeasts more readily because the bran and germ provide additional nutrients.
My rye flour experiment taught me patience in completely new ways. Rye creates incredibly active starters that smell almost fruity when healthy. I remember opening my jar after three days and catching this amazing aroma that reminded me of fresh apples mixed with sourdough tang. Rye starters also develop this gorgeous dark color that makes them look ancient and mysterious.
Now I maintain what I call my “starter family” – three different cultures living happily in my refrigerator. My all-purpose starter handles everyday bread making, while my whole wheat version creates weekend artisan loaves. The rye starter gets special treatment for dense, European-style breads that pair perfectly with sharp cheeses.
Actually, you can substitute different flours gradually without shocking your culture’s ecosystem. I learned this after accidentally killing two starters by switching flours too quickly. Start by replacing just 25% of your regular flour with the new variety, then increase the percentage over several feedings. This gentle transition lets your starter’s bacterial community adapt slowly.
So many people ask me about gluten-free options for their beginner sourdough starter tips. I’ve successfully maintained starters using brown rice flour, though they behave quite differently from wheat-based cultures. Rice flour starters ferment more slowly and produce milder flavors, but they absolutely work for those avoiding gluten. You’ll need extra patience since rice doesn’t feed wild yeasts as efficiently as wheat varieties.
Temperature becomes even more critical when working with alternative flours. My whole wheat starter doubles in size within four hours during summer heat, while my all-purpose version takes six to eight hours under identical conditions. Actually, I keep detailed feeding notes for each starter type because their schedules vary so dramatically.
Don’t overlook bread flour as a starter option either. I created one using high-protein bread flour that produces incredibly strong, elastic dough perfect for challenging shapes like baguettes. This starter develops more slowly than all-purpose versions but creates superior gluten structure in final loaves. Plus, bread flour starters seem more forgiving during irregular feeding schedules, probably because the higher protein content provides sustained nutrition for the culture.
Frequently Asked Questions
Moving on, ### How to make sourdough starter for the first time?
Creating your first sourdough starter feels magical, and I promise it’s simpler than you think! I start with equal parts flour and water – just 50 grams each in a clean jar. Then I mix them well, cover loosely, and leave at room temperature. For the first week, I discard half daily and feed with fresh flour and water. You’ll see bubbles forming around day 3-5, which means wild yeast is working. The smell transforms from funky to pleasantly tangy as your starter matures and develops strength.
What is the biggest mistake with sourdough starter?
The biggest mistake I see beginners make is giving up too early when their starter seems sluggish or smells weird. Actually, those funky smells during the first week are totally normal! Your starter goes through phases – sometimes it’s bubbly, sometimes flat, and the aroma changes daily. I’ve learned that consistency matters more than perfection. Don’t worry if it looks liquidy or develops a dark layer on top. Just keep feeding it regularly, and trust the process. Most “failed” starters just need more time and patience.
What is the 1:1:1 rule for sourdough?
The 1:1:1 rule is my go-to feeding ratio that keeps everything simple and consistent. It means equal parts starter, flour, and water by weight. So if I keep 50 grams of starter, I add 50 grams flour and 50 grams water. This ratio works perfectly for maintaining a healthy starter that doubles predictably. I use this ratio for daily feeds when my starter lives on the counter, though I sometimes adjust to 1:2:2 if I want to slow down fermentation or extend time between feeds.
What is the easiest sourdough starter?
The easiest starter uses just all-purpose flour and water – no fancy ingredients needed! I recommend starting with white all-purpose flour because it ferments faster than whole wheat and shows clear signs of activity. You don’t need filtered water unless your tap water is heavily chlorinated. Just mix equal weights in a jar, feed daily, and watch for bubbles. Some people add pineapple juice or grapes, but honestly, flour and water work perfectly. The key is choosing a consistent routine you can actually stick with long-term.
My Final Thoughts on Your Sourdough Journey
Starting your own sourdough starter truly feels like welcoming a new family member into your kitchen. I’ve watched countless beginners transform from nervous first-timers into confident bakers, and it always brings me such joy. The beauty of this process lies in its simplicity – just flour, water, and patience create something absolutely magical.
What makes this recipe so special to me is how it connects us to generations of bakers before us. Every time I feed my starter, I’m reminded that people have been nurturing these living cultures for thousands of years. You’re becoming part of that incredible tradition.
The most important things to remember are consistency with your feeding schedule and trusting the process when things don’t look perfect immediately. Your starter will develop its own personality and rhythm, just like mine did five years ago.
I’d love for you to try this recipe and share your sourdough journey with me! Leave a comment below and tell me – what’s the first thing you plan to bake with your new starter?
Why Trust Me?
I’ve been cooking this recipe for years and have made it dozens of times for family and friends. It’s become one of my go-to dishes, and I’ve refined it through lots of trial and error to get it just right.
Beginner Sourdough Starter
Ingredients
Method
- Day 1: Mix 50g whole wheat flour with 50g filtered water in your clean jar. Stir well until no dry flour remains.
- Cover loosely with coffee filter or cloth secured with rubber band. Let sit at room temperature for 24 hours.
- Day 2: You may see small bubbles forming. Discard half the mixture, then add 50g all-purpose flour and 50g water. Stir well.
- Day 3-4: Continue daily feedings by discarding half and adding 50g flour and 50g water. The mixture should start smelling tangy.
- Day 5-6: Your starter should double in size within 4-8 hours after feeding. Bubbles will be more active and smell pleasantly sour.
- Day 7: Perform the float test by dropping a spoonful in water. If it floats, your starter is ready to bake with.
- For maintenance: Feed weekly if refrigerated, or daily if kept at room temperature using the same 1:1:1 ratio.
- Always use clean utensils and filtered water to prevent contamination and maintain healthy starter activity.